If you have invested in NFTs and made a profit, either as a creator or from flipping NFTs, then you might be curious to know how to get your crypto from Metamask back into your Coinbase account. Although it’s not difficult, there is a strict process you need to follow to ensure you get your crypto transferred safely.
Below is a step-by-step guide for how to transfer your crypto from your Metamask wallet to Coinbase, and finally into your bank account.
How to Transfer Crypto from MetaMask to Coinbase
1. Copy your wallet address from Coinbase
Before you can transfer your crypto to your Coinbase account, first you need to get your Coinbase wallet address. To do this, follow these five simple steps below:
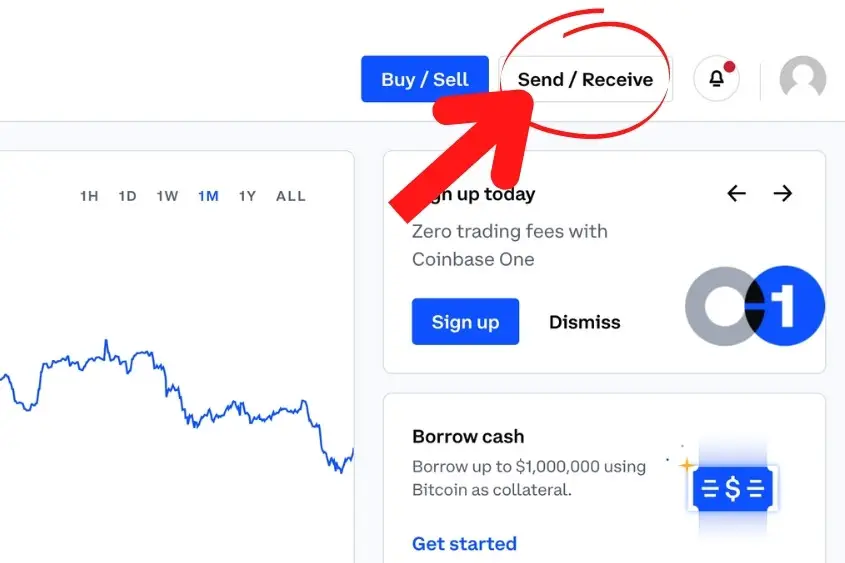
- Sign in to your Coinbase account.
- Go to Send/Receive.
- Select Receive.
- Choose the asset that you are sending to Coinbase (ETH, BTC, etc.)
- Copy the address provided by Coinbase.
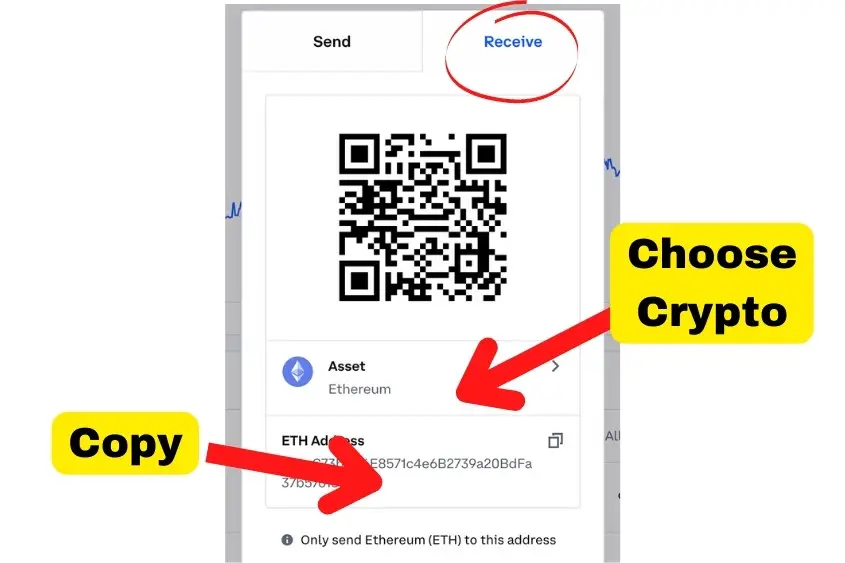
Copying your Coinbase wallet address is one of the most important steps. Always make sure you choose the correct asset before trying to send any crypto to your Coinbase account from Metamask.
For example, if you are trying to send ETH from Metamask to Coinbase, make sure to choose Ethereum (ETH) as the asset you are receiving in your Coinbase account, otherwise, you risk sending your crypto to the wrong Coinbase address.
2. Enter your Coinbase address into Metamask to Send
After you have verified that you have the correct Coinbase wallet address for the crypto you are sending from Metamask to Coinbase, you are going to paste your Coinbase address into Metamask. Follow the steps below:
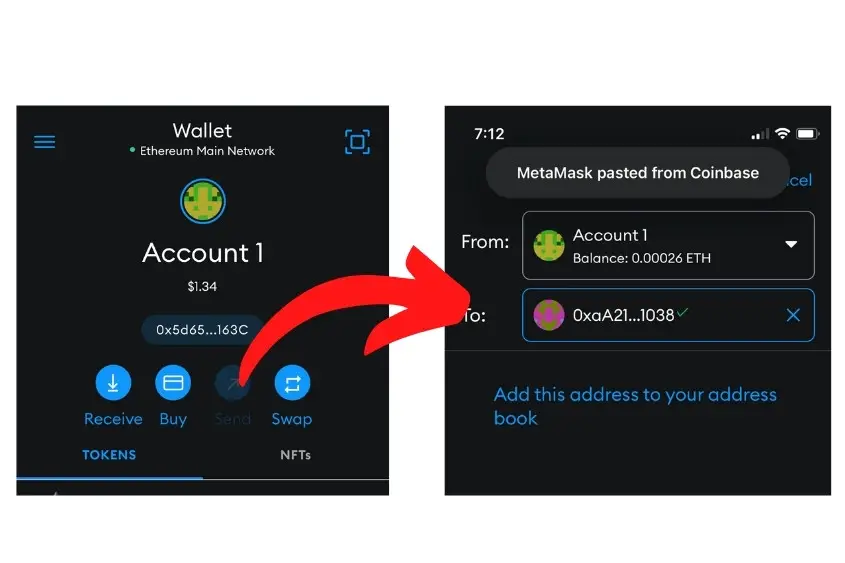
- Sign in to your Metamask account.
- Go to the Wallet tab.
- Select Send.
- Paste your Coinbase wallet address (double-check you have the correct address and asset).
- Choose the amount you want to send.
- Hit Next and then confirm the transaction fees.
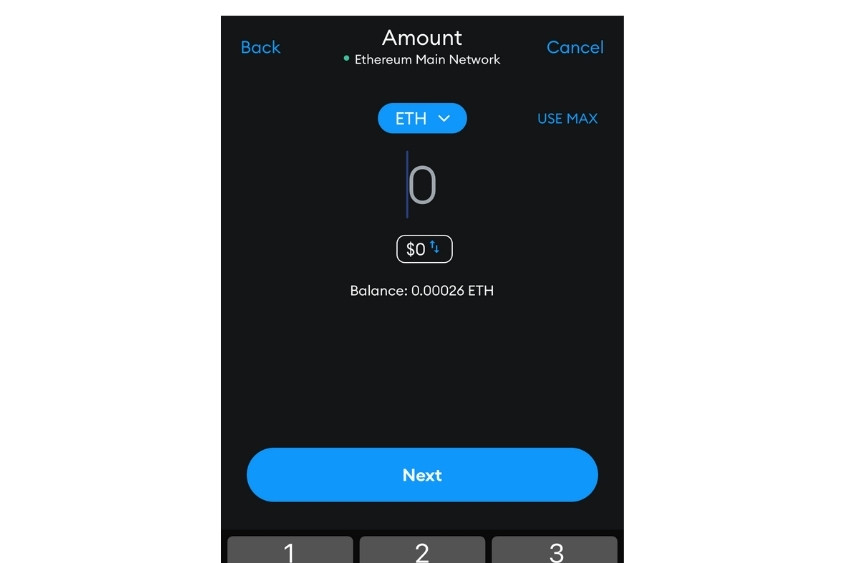
Note, when choosing your gas fee, I always recommend going with the quickest option. Not only will the transaction get to your Coinbase account quicker, but it is less likely that the transaction will fail if you choose the High gas fee option. Also, it doesn’t cost too much extra.
Congratulations! Your transaction should now be pending and your crypto should be on its’ way to your Coinbase account. Depending on the gas speed you chose, your crypto can take several seconds to a few minutes to reach your Coinbase account, so be patient.
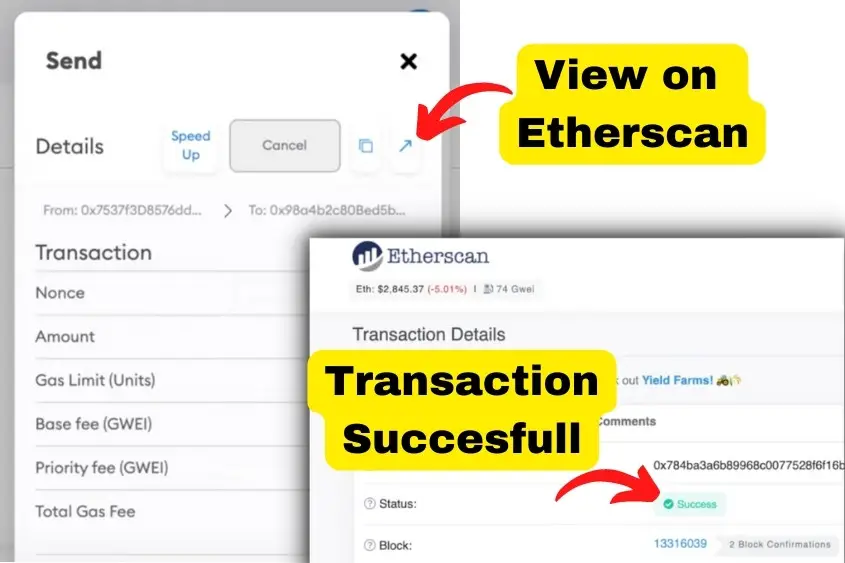
If you would like to view and verify your transaction on the blockchain, you can do so by clicking on the transaction and then tapping the arrow which will take you to the transaction on Etherscan.io. If your transaction does not appear immediately, don’t panic. Wait a few seconds and then refresh the page.
If your transaction is still pending, Etherscan will say so. If the transaction is complete, Etherscan will display Success with a checkmark next to it in the Status section.
3. Wait for Coinbase to process your transaction
Now that you have verified your transaction is successful using Etherscan, you will have to wait several minutes for Coinbase to process your transaction.
Although Etherscan has said your transaction is successful, it still takes Coinbase a while to process the transaction on their end. It can take up to 15 minutes for your crypto to appear in your Coinbase account.
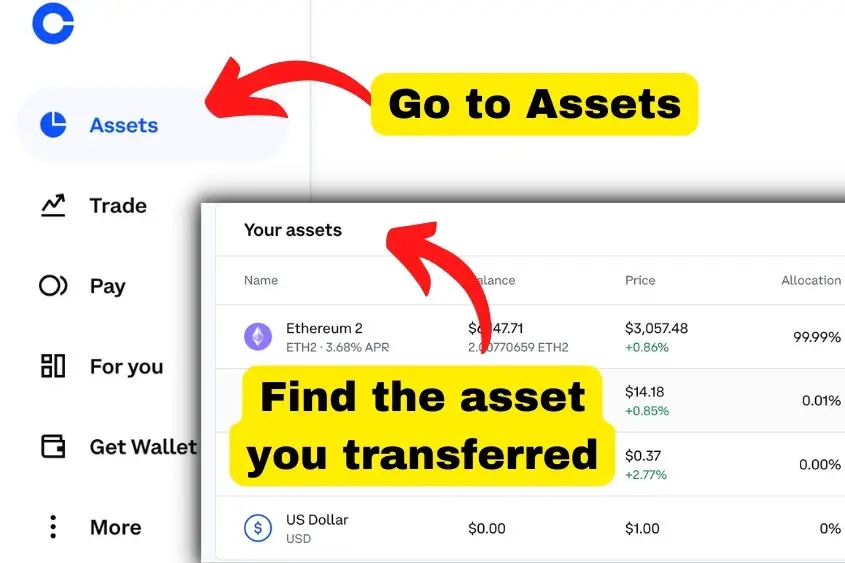
You can check to see if you have received your crypto by going to the Assets tab in Coinbase, and then find the asset that you transferred from Metamask to your Coinbase account. From there, select your crypto, then go to Wallet where you are able to view all your transactions.
If you don’t see your most recent transaction or if it is still pending, check back in a few minutes.
How to Transfer Crypto from Coinbase to Your Bank Account
So you have successfully transferred crypto from your Metamask wallet to Coinbase, but what if you want to take things a step further and transfer crypto from Coinbase to your bank account? It’s easy! Allow me to walk you through this process in a few simple steps.

- Log into your Coinbase account.
- Tap the Buy/Sell button.
- Choose Sell.
- Pick the crypto you want to cash out and the amount.
- Choose your fiat (USD, GBP, etc.)
- Select Sell Now (Coinbase fee will apply.)
- Choose Cash Out and the amount.
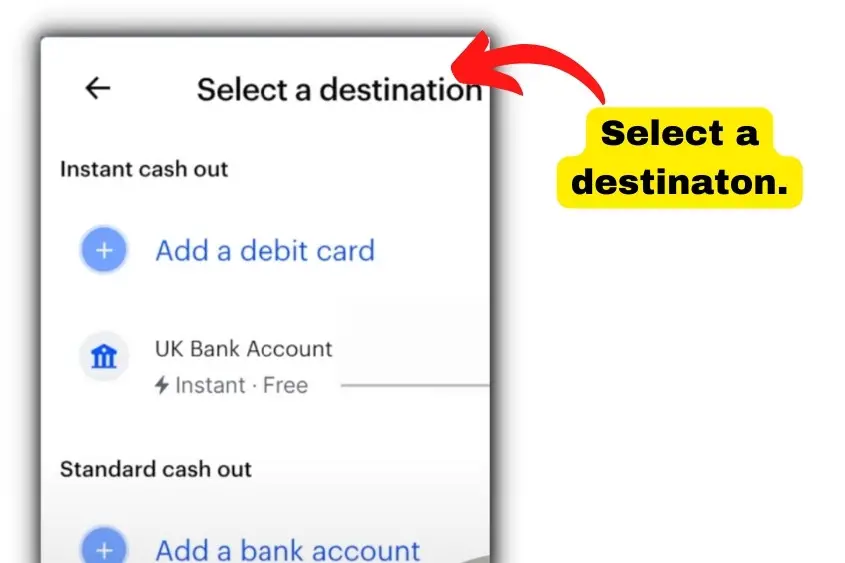
- Select a destination (Bank account, debit card, etc.)
- Hit Cash Out.
- Select a bank account or debit card.
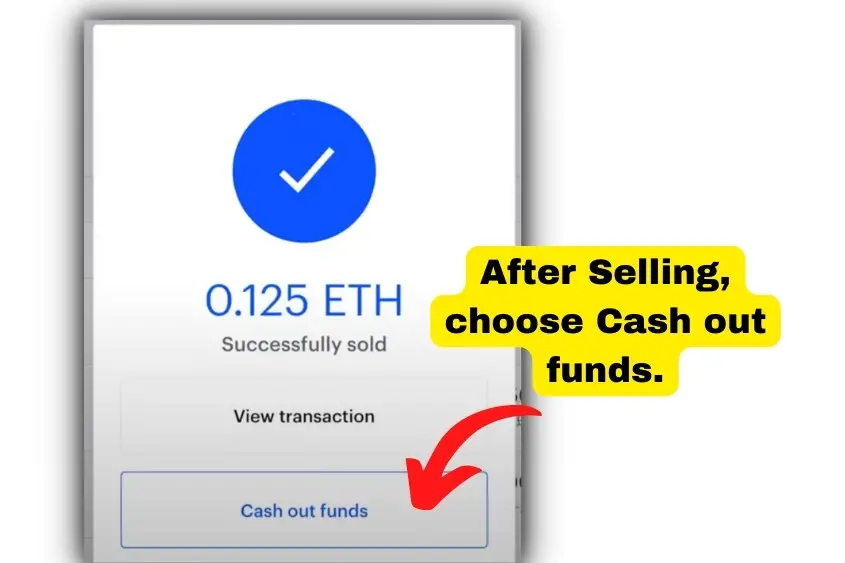
That’s it! You are done! If you already have a bank account or debit card connected to your Coinbase account, your funds will appear in your bank account instantly. If you have to add a new bank account or debit card, then you are subject to Coinbase’s terms and conditions, and your funds can take up to a couple of weeks to arrive in your bank account.
Key takeaways
Sending cryptocurrency from your Metamask wallet to your Coinbase account is quite simple, but there are a few things that you should keep in mind when going through the steps.
- Always verify you have the correct Coinbase wallet address before hitting Send.
- Make sure you are set to receive the correct cryptocurrency in your Coinbase account.
- When choosing the gas speed, remember that the High fee will always result in a quicker transaction time, meaning your transaction is less likely to fail.
- It can take several minutes for Coinbase to process your transaction, be patient.
- When selling your crypto for fiat, remember that you are subject to Coinbase transaction fees.
- If you already have a bank account or debit card approved on your Coinbase account, your money will be transferred instantly. If not, it can take up to a couple of weeks.

1 thought on “How to Transfer Crypto From Metamask to Coinbase (DO THIS)”
Comments are closed.