If you are concerned about your crypto-security when using a software wallet such as Metamask, then you have likely stumbled upon some talk about the safest type of NFT wallets, hardware wallets (cold-storage wallets).
Transferring your digital assets to a hardware wallet is the best way to ensure your NFTs and cryptocurrency are safe from hackers. Although sending your tokens away may seem like a daunting task, it’s actually very simple and only takes a few minutes.
How to Set Up A Ledger Hardware Wallet
Preparing your cold-storage wallet is easy, but it does require a few things. For this example, I will be setting up my Ledger Nano X hardware wallet and connecting it to my Metamask software wallet.
Here’s what you will need to set up your Ledger wallet:
- (1) Hardware wallet (Ledger Nano S Plus, Ledger Nano X, Ledger Stax)
- (1) USB connector (you need to connect your Ledger with Metamask via USB)
NOTE: If your computer doesn’t have a USB port, you will need an adapter. - (1) Metamask account (download the Metamask extension and mobile app on the Metamask official website.)
- (1) LedgerLive App (download both desktop and mobile versions on Ledger.com)
- Last but not least, you will need some ETH in your Metamask wallet so that you can pay the transaction fees associated with transferring NFTs on the blockchain.
Once you have gathered all the necessary items you may begin to set up your hardware wallet.
1. Power on your Ledger wallet
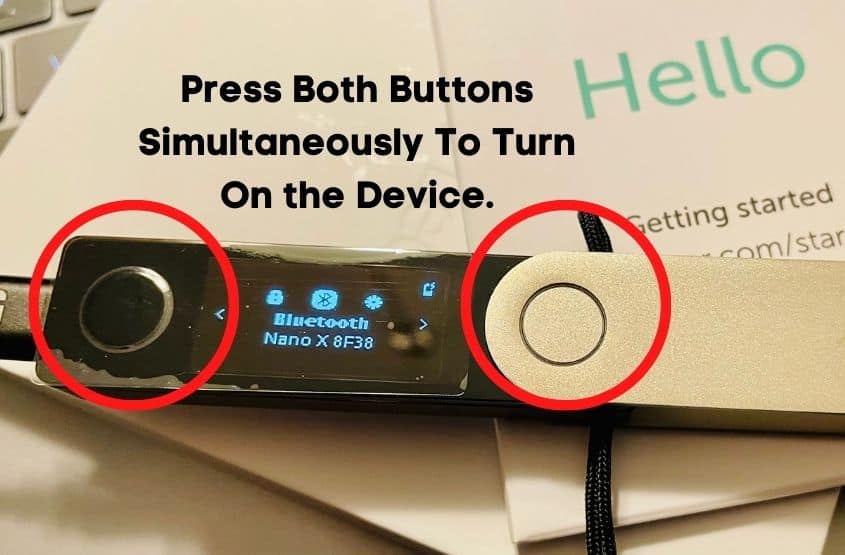
To power on your Ledger Nano X, simply press and hold both left and right buttons. Once powered on, the device will present you with some basic information regarding functionality and the Ledger Live App. Navigating a Ledger wallet is very basic so it shouldn’t take long for you to grasp the controls.
2. Setup new device—choose a pin code and record your secret phrase.
After you have read through everything, you will be prompted to create a new device. To confirm the device setup, press both buttons simultaneously. You will then be asked to create your own pin code along with recording and re-verifying your secret phrase. Make sure to review your secret phrase and verify that all words match the phrase being displayed by your wallet before proceeding beyond this point.
Next, open up the Ledger Live app. You will be presented with a screen offering various options. Considering you have already set up your pin code and documented your secret phrase—you want to select Skip Device Setup.
Now you are ready to select the device you are currently setting up. In this case, I chose the Ledger Nano X. After you choose which device you are using, you will be taken through a brief security checklist. Here, you will confirm you have created your own pin and successfully saved your secret phrase.
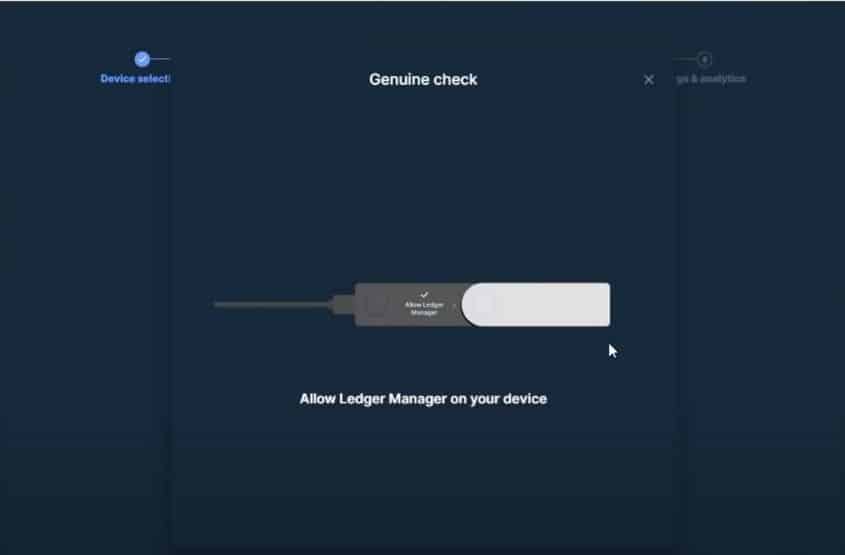
At this point, you will now connect your hardware wallet to your computer so that you can verify you are using a genuine Ledger device. Once your wallet is connected to your computer, choose Check Now.
You will then need to allow Ledger Manager on your hardware wallet. To do this, go to your device and select Allow Ledger Manager. If your device is legit, Ledger Live will notify you that your device is genuine.
Now that you have completed the security checklist, you will be asked if you would like to create a password for Ledger Live. Creating a password is optional, however, I highly recommend you choose to create a password. This will add an extra layer of security to your Ledger Live account.
Finally, you will have to confirm if you want to enable Ledger to collect analytical data and bug reports. This will help Ledger improve the user experience and fix any bugs that may occur. Keep in mind that this is optional. Personally, I prefer not to enable either report. Ultimately, the choice is yours.
NOTE: Make sure you keep your secret phrase written down and tucked away in a secure location. Every Ledger wallet comes with some handy recovery phrase sheets. Remember, NEVER share your secret phrase with anyone. Your secret phrase allows complete access and control over your crypto wallet.
3. Create an account to manage all your digital assets
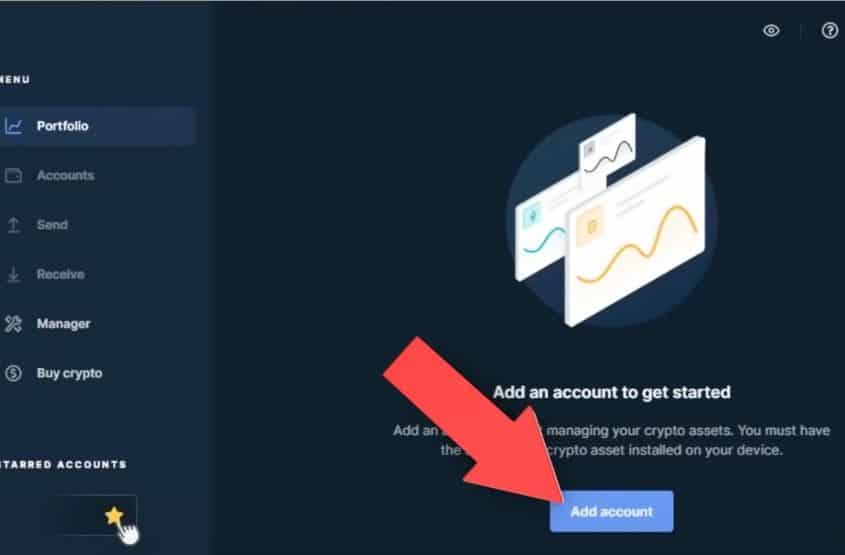
Now that you have successfully set up your Ledger hardware wallet, you will need to create an account before you are able to download any apps which allow you to obtain your cryptocurrency of choice and transfer your beloved non-fungible tokens to your wallet.
Open Ledger Live and head to your portfolio after accepting the terms of use. Select Add Account to make your very own Ledger Wallet profile. Once you have finished creating your profile, you will be able to download your preferred blockchain app.
4. Go to Manager in Ledger Live to download your preferred blockchain apps
Good job, you are now ready to download your preferred blockchain applications. For this example, I downloaded the Ethereum App so that I could transfer my ERC20 non-fungible tokens from Metamask to my Ledger Nano X.
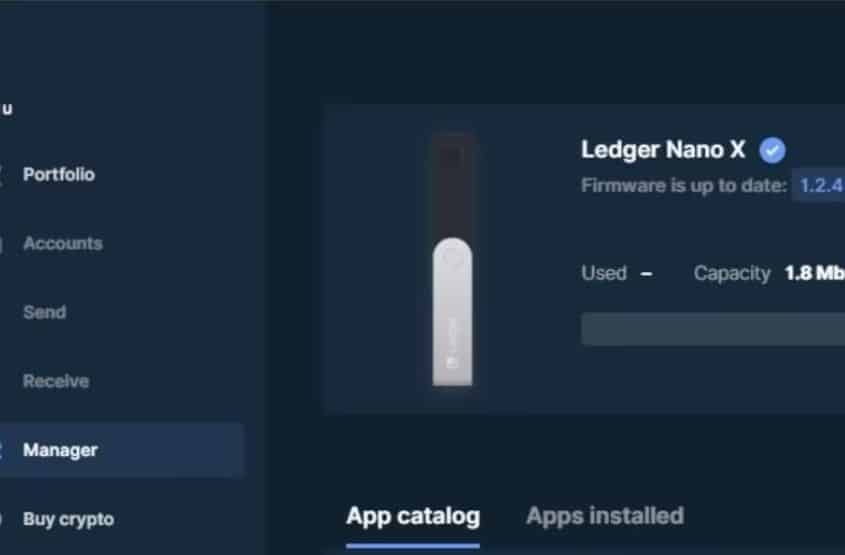
Before installing any new apps onto your Ledger wallet, make sure the firmware is up-to-date. You can check your current firmware in the Manager tab in Ledger Live. Also, always ensure you are using the latest version of the ledger live. If there is an update available, it will be posted on the portfolio page. All you need to do is select Update. If you want to view your current Ledger Live version and the details, go to settings>about>version>details.
After you have verified your device and Ledger Live is running on the most current version, go to the Manager in Ledger Live to view the App catalog. Here you will find all the apps that are supported on your Ledger device. You may also view any apps you have already downloaded by choosing the Apps installed tab.
Find the blockchain app that you want to install and then hit Install. You are able to install multiple apps at the same time if you desire. When the app is finished downloading to your Ledger hardware wallet you will see it appear on your device.
At this time, you are now able to securely transfer your NFTs to your Ledger hardware wallet. Let’s get to it!
How to Transfer NFTs to Your Ledger Hardware Wallet
To transfer your NFTs to your Ledger wallet follow the steps below.
- Connect your Ledger device to Ledger Live.
- Go to the Receive tab in Ledger Live.
- Confirm and copy your Ledger public wallet address.
- Send your desired NFTs to your Ledger wallet address.
Seriously, it’s that easy. But no worries if you’re still a bit confused, I’m going to break it all down for you below.
1. Connect your Ledger device to Ledger Live
First, connect your Ledger wallet to Ledger Live. Once you are connected, confirm your device and Ledger Live are up-to-date.
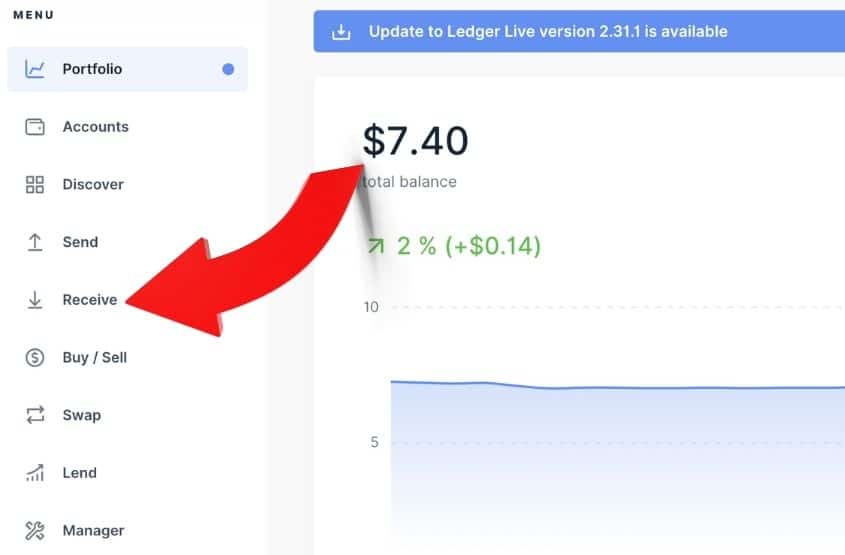
After verifying your updates, go to the Receive tab located in the Ledger Live Menu.
2. Go to the Receive tab in Ledger Live
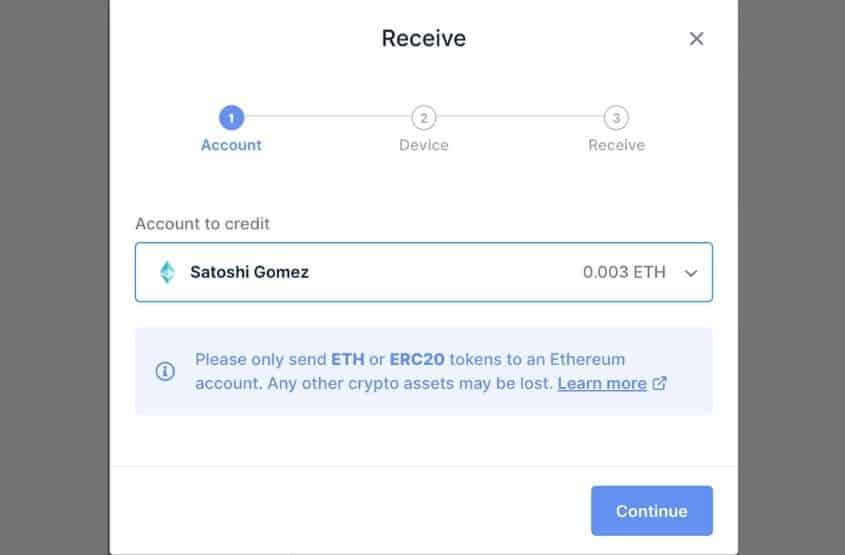
After you hit receive you will need to select the account you wish to send your NFT to. In my case, I only have one account to choose from. Once you have verified the correct account, continue to your wallet address.
3. Confirm and copy your Ledger public wallet address
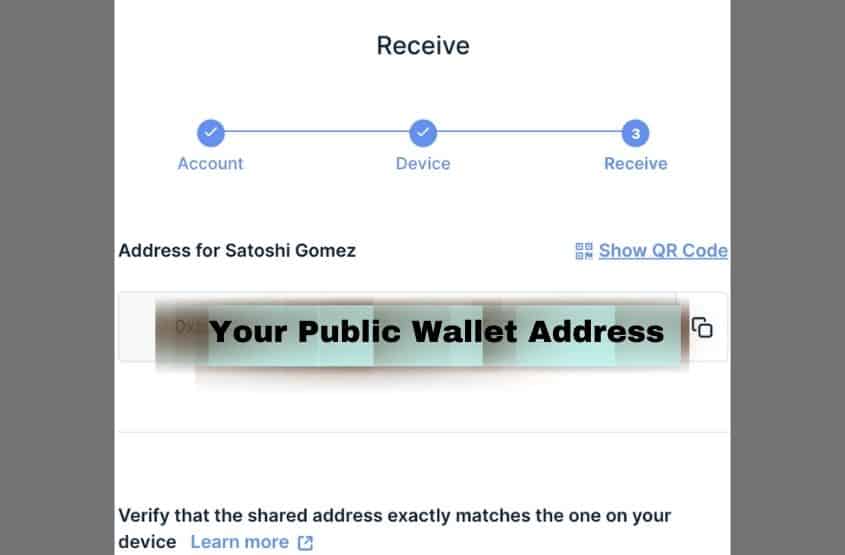
The address displayed here is your public wallet address. This address is stored on the blockchain and it’s how you will receive cryptocurrency and NFTs in your hardware wallet.
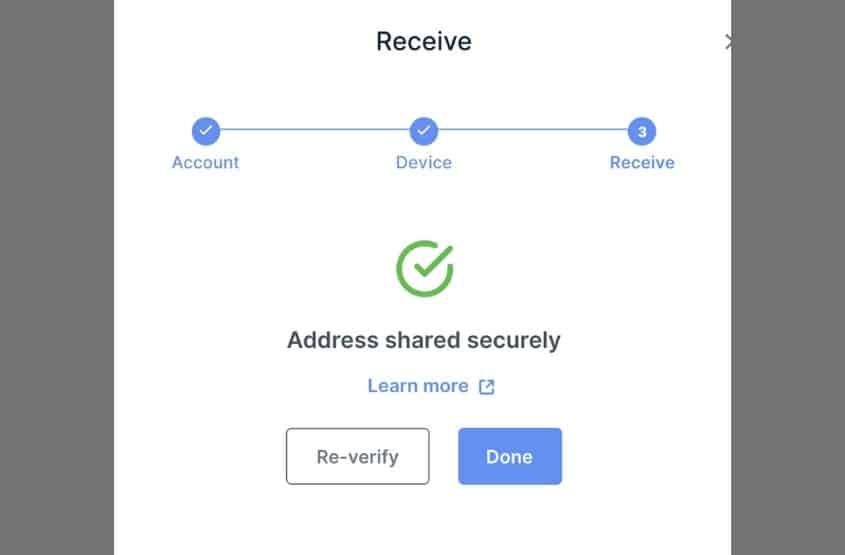
You will need to verify that the address displayed on Ledger Live is the address shown on your Ledger device. If both addresses match, confirm it on your device. Now you are ready to send your non-fungible tokens to your super-secure hardware wallet!
4. Send your desired NFTs to your ledger wallet address
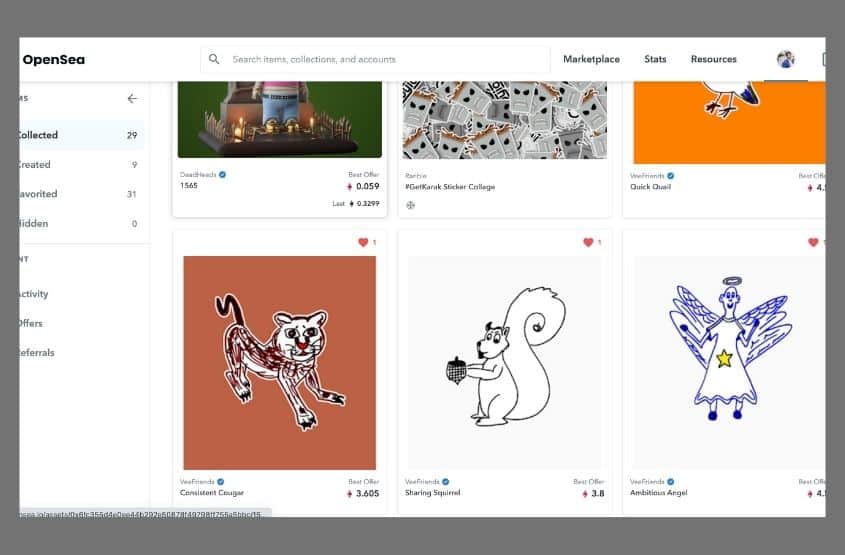
Depending on where your NFTs are stored, you will need to go to the specific token you are trying to send. You can send NFTs from your software wallet such as Metamask and even from marketplaces such as Rarible and OpenSea where your tokens are accessible.
If you aren’t familiar with how to transfer an NFT to another wallet address, I have created a step-by-step guide for your convenience.
NOTE: You are required to pay any associated gas fees when transferring NFTs to your hardware wallet. For this reason, you will need to have enough currency in the wallet that is sending your token.
How to Connect a Ledger Wallet to Metamask
For example’s sake, I’m going to show you exactly how to connect your hardware wallet to your software wallet such as Metamask—which makes transferring and buying NFTs with your hardware wallet even easier.
WARNING: If you decide to connect your hardware wallet to the internet, you are at risk of being hacked. One of Ledger’s main forces of security is thanks to its private info being stored offline, in addition to its security infrastructure. However, the moment you connect it to the internet, you put your wallet at risk. For this reason, you might want to consider using two hardware wallets (one for transactions and one solely for storage).
Connecting your hardware wallet to a software wallet like Metamask allows you to conveniently view your digital assets and recent activity. So, how do you connect your hardware wallet to Metamask?
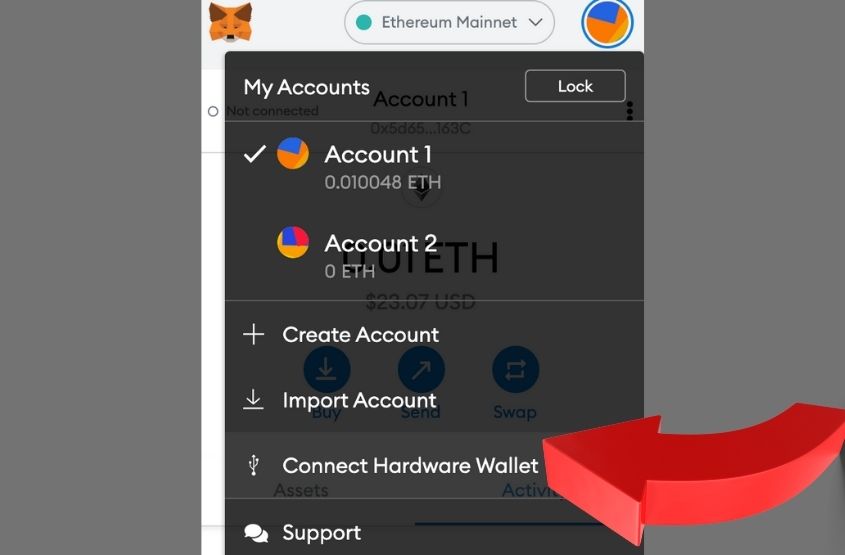
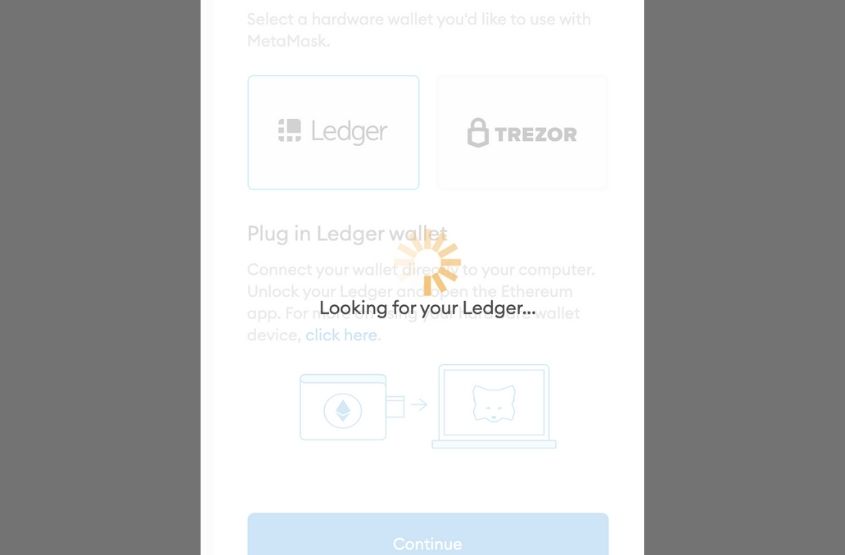
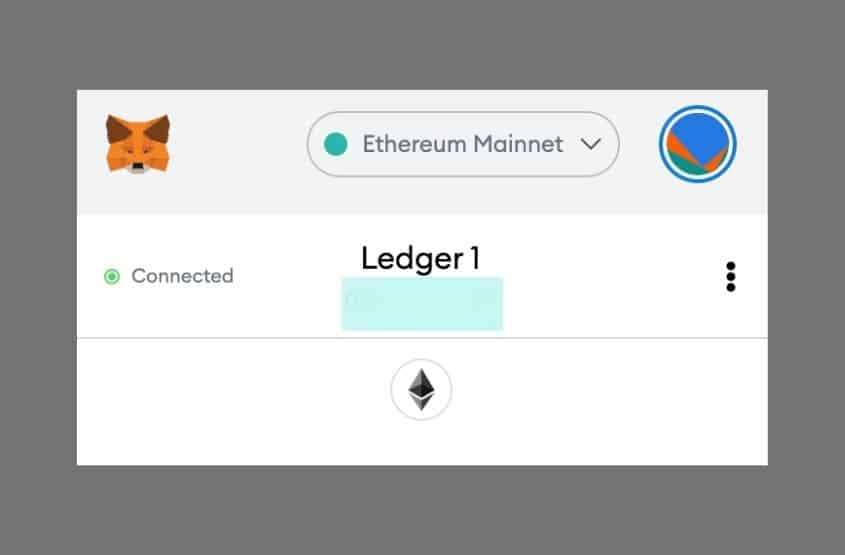
To connect a hardware wallet to your Metamask account, ensure your wallet is connected to your computer via USB. Next, click the circle logo to the right of the mainnet dropdown in Metamask to bring up your accounts. Select Connect Hardware Wallet. Then, choose your hardware wallet device and pick which address you want to link to Metamask.
After you have connected your hardware wallet to Metamask, you are able to safely purchase NFTs using your hardware wallet. When you purchase an NFT through Metamask using your hardware wallet, you don’t need to worry about transferring your tokens from Metamask to your hardware wallet. They will already be tucked away safely in your hardware wallet’s specific blockchain address.
Moreover, just because your NFTs don’t appear in your hardware wallet’s account on Metamask, doesn’t mean you don’t have any of your digital assets. Your assets are kept on the blockchain, not in the wallet itself. Your wallet simply stores your pin code and secret phrase which allows you control over your blockchain address. If you would like to see your NFT collection, I recommend viewing it using OpenSea or Rainbow.
Overall, setting up your hardware wallet may appear to be a difficult task but it’s really quite simple. Storing your NFTs in a hardware wallet like the Ledger is one of the most secure ways to store your non-fungible tokens.
Setting up a hardware wallet is as easy as creating your own personal pin code, recording your secret phrase, and downloading the appropriate blockchain application that works for you.
Ultimately the choice is yours. But, why risk it when setting up your own hardware wallet is so easy?
6 thoughts on “How to a Setup Ledger Hardware Wallet and Transfer NFTs to It”
Comments are closed.