You don’t have to spend a lot of money to create an NFT. In fact, you can create an NFT for free in minutes. I went through the entire creation process myself just to show you how easy it really is. So, how do you create an NFT for free? Let me show you.
How to Create an NFT for Free
To create an NFT for free, use Opensea. First, get a crypto wallet. Then sign in to Opensea using your wallet. Next, tap “Create” to begin filling in your NFT’s details and upload a file (image, jpeg, vid, etc.) to represent your NFT. Finally, ensure the details are correct before tapping create.
Follow these four quick and easy steps below to create your NFT with no money.
1. Get a Crypto Wallet
To create an NFT you need a crypto wallet. There are several wallets you can use on Opensea.
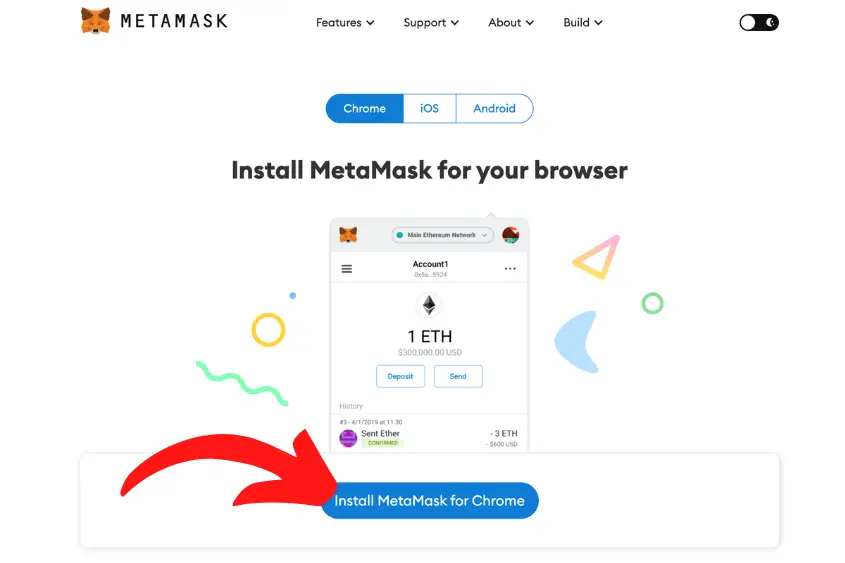
However, Metamask is free, easy to use, and one of the most popular crypto wallets on the market.
Once you download Metamask and after you have stored your recovery phrase in a secure, physical location, you’re ready to create an NFT.
2. Sign in to Opensea Using Your Web3 Wallet
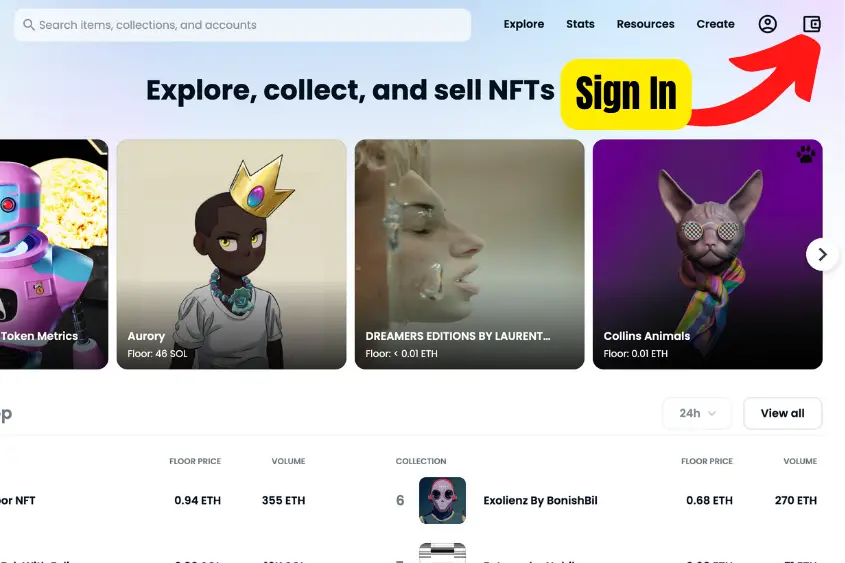
Go to Opensea.io and sign in by clicking on the wallet logo in the upper-right corner, and select the wallet you’re using.
You will need to authorize the connection using your wallet as your signature of approval.
Once you’re signed in, you can start to create your NFT.
3. Tap Create and Fill in Your NFT’s Details
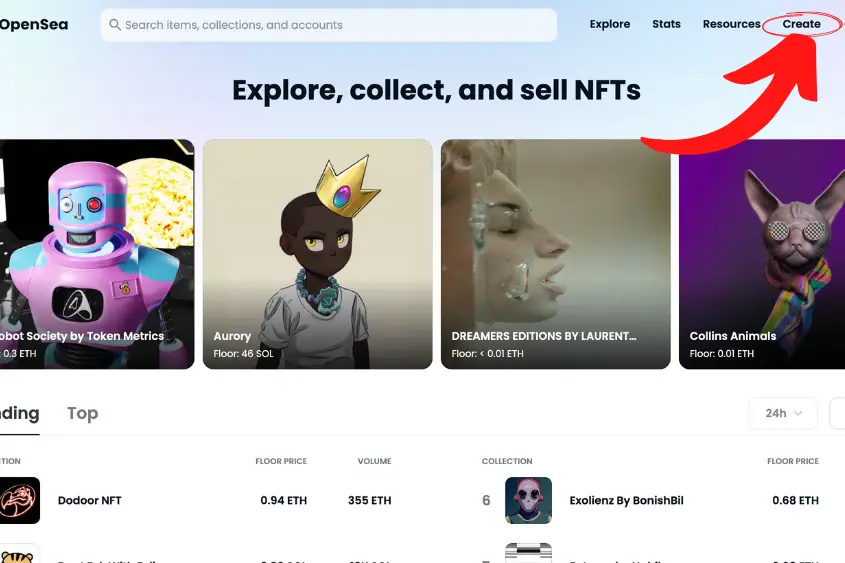
To begin creating your NFT tap “Create” in the upper-right on Opensea’s homepage.
You will be directed to the “Create New Item” page. From here, creating your NFT is a matter of uploading your preferred file and filling in any details you want to include in your NFT.
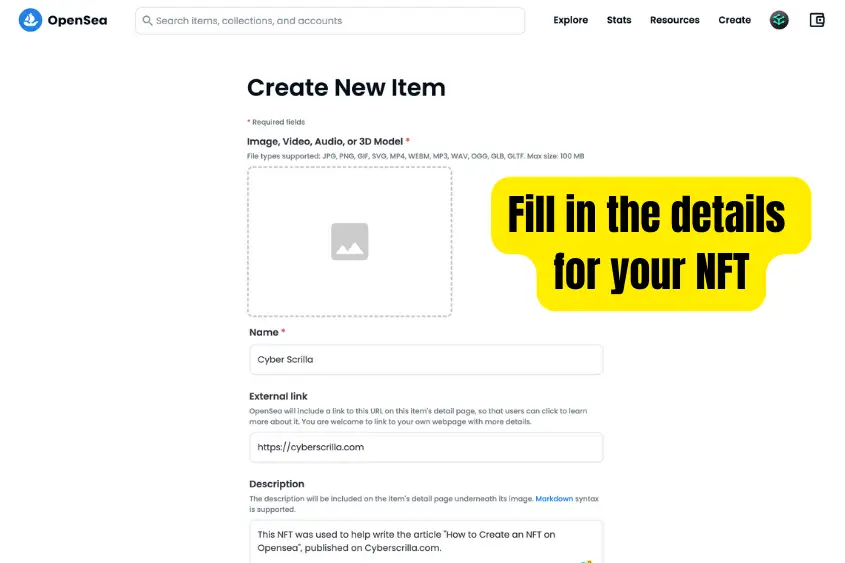
You have several options for customizing your asset. Below is a complete list of the fields you need to fill out (some of these fields are optional).
- Image, Video, Audio, or 3D Model: This will be the face of your NFT. Opensea supports JPG, PNG, GIF, SVG, MP4, WEBM, MP3, WAV, OGG, GLB, and GLTF with a max size of 100 MB.
- Name: Give your NFT a nice name. Generally, shorter names are better. But, it’s up to you to decide the most fitting name for your creation.
- External link (optional): You can include an external link on your item’s page. This is perfect if you have a website outside of Opensea that gives more context to your project, brand, or portfolio.
- Description (optional): Enter a description of your NFT to be included on the item’s detail page underneath the image. Markdown syntax is supported so that you can structure it in an organized manner.
- Collection: You need to choose a collection that you want your NFT to be created. If you haven’t created a collection, don’t worry, it will default to your Opensea profile. You can change which collection it is showcased in later.
- Properties (optional): This is where you will enter your asset’s traits if it has any. This can be a specific background or items that a character wears in your design. You can add as many properties as you’d like. These traits will also be used to help filter through your NFTs if you plan to have multiple in a single collection.
- Levels (optional): You can add numerical level traits that show as a progress bar. This only makes sense if you have a use for levels in your NFT collection. Don’t feel like you have to add levels to your creation.
- Stats (optional): Stats are numerical traits that show as numbers. You can add a statistical name and enter its value on a scale of 1 to 5. Again, don’t feel like you need to add this if you have no use for it.
- Unlockable Content (optional): You can include unlockable content that can only be revealed by the owner of the item. This is where you’d add any additional utility to your NFT such as a coupon code, a link to claim a free product, or something else you only want available to the holder.
- Explicit & Sensitive Content (optional): If your NFT is considered explicit, and deemed not safe for work (NSFW) content, enabling this will protect users with safe search while browsing OpenSea. Make sure to enable this if your creation falls under this category. Otherwise, you risk it being flagged and removed from Opensea.
- Supply: This is where you enter the total supply of NFTs you want to make available. You can do as little as 1 or as many as you want.
- Blockchain: Choose which blockchain network your NFT is going to be minted on. You can choose from Arbitrum, Ethereum, Klaytn, Polygon, Optimism, and Solana networks. Ethereum is the most popular blockchain for NFTs.
- Freeze Metadata (optional): Freezing your metadata enables you to permanently lock and store all of your item’s content in decentralized file storage. Once locked, your content can’t be edited or removed as it is permanently stored in decentralized file storage, which will be accessible for others to view and use. (You can only enable this option after you create your NFT.)
NOTE: If you don’t want to pay a gas fee to sell your NFT make sure to choose the Polygon blockchain when creating your NFT. Also, Solana transaction fees are less expensive than Ethereum if you don’t want to use Polygon.
Creating an NFT on Polygon requires you to switch your wallet network to Polygon. Simply follow Opensea’s onscreen instructions to do this.
Moreover, to create an NFT on the Solana blockchain you will need to get a Solana NFT wallet and then follow these steps the same.
4. Create Your NFT for Free
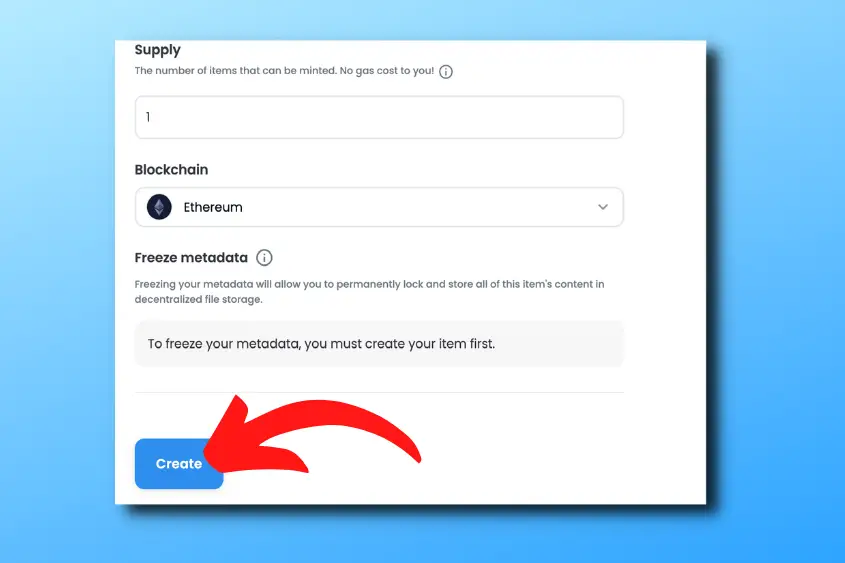
After you have filled out all the details for your NFT, hit Create. Your NFT will automatically be created for free.
This is called Lazy Minting. Basically, your NFT isn’t minted on the blockchain until someone decides to purchase it. Upon purchasing your item, the buyer will pay the gas fee to mint it on the blockchain.
Don’t worry if you discover that you’ve made a mistake when you created your item, you can still edit it as long as it hasn’t been sold and as long as you don’t freeze the metadata.
To edit your NFT, simply click on it and select Edit.
Additionally, you can create an NFT collection on Opensea for free if you’re wanting to sell multiple NFTs or simply create different collections.
How to Sell Your NFT for Free
Once you’ve created your NFT, you probably want to know how to sell it. To do this, you will need to list it for sale. To sell your NFT for free, follow these three simple steps.
1. Choose the NFT You Want to Sell
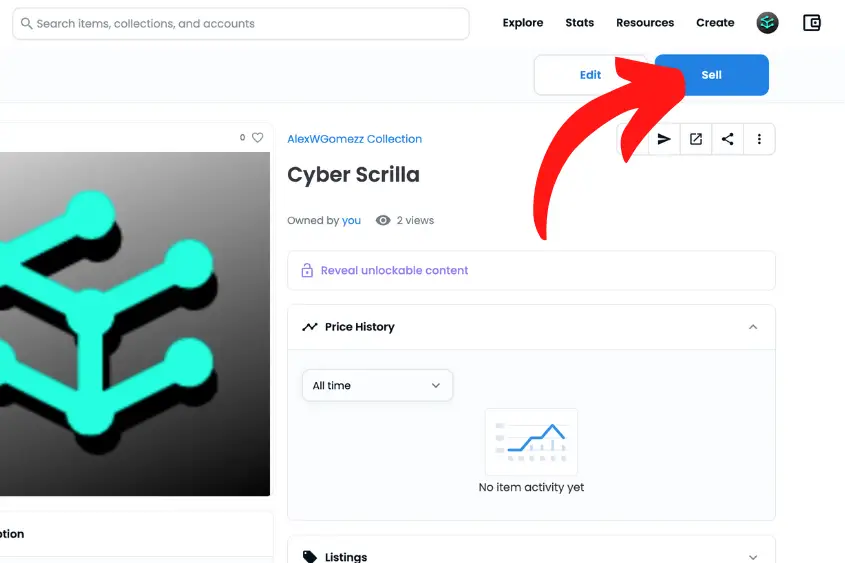
Pick the NFT that you want to list and tap “Sell”.
2. Price Your NFT and List it for Sale
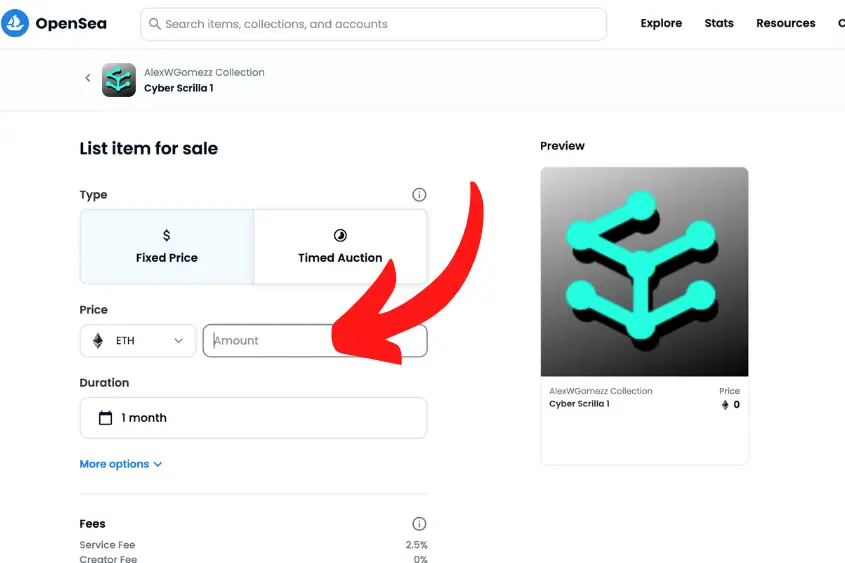
Price your NFT accordingly and then choose how you want to list it.
You can choose to list your item at a Fixed Price or a Timed Auction. The minimum amount of time you can list an NFT is 15 minutes and the maximum is 6 months.
If you list your NFT as a Timed Auction, then you can choose to sell it to the highest bidder after the time you set has been reached (you can enable a reserve price as well). Or, you can list it with a declining price (with a set ending price).
3. Approve the Listing Using Your Wallet
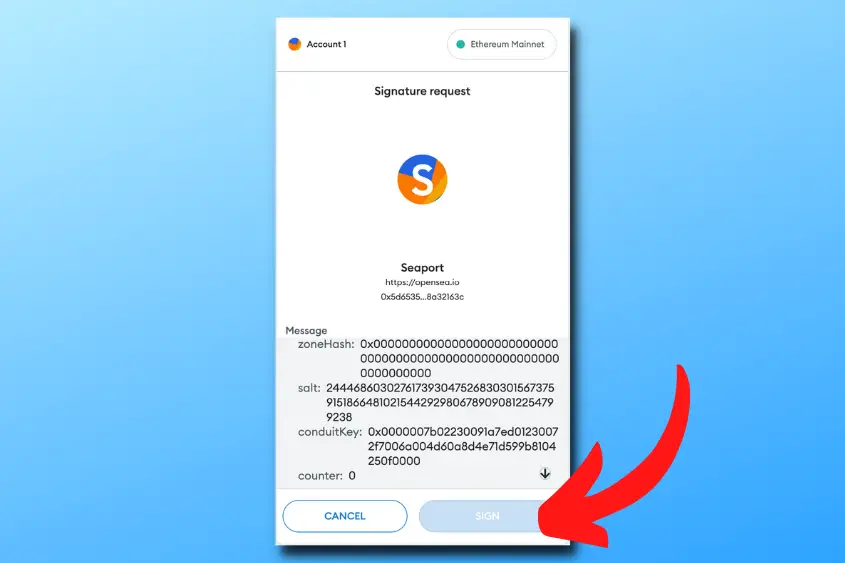
If it is your first time selling on Opensea, you will need to pay a gas fee to allow Seaport to interact with your item (or all items in the collection, if the collection supports it) using your wallet.
This has to be done once per collection. These fees range anywhere from $5 to over $100.
You will be required to sign and approve the transaction using your wallet and the fee will be deducted from your wallet upon approval.
Once approved, your NFT will be listed for sale.
If you want to cancel your listing you will have to pay a gas fee. However, if you just want to lower the fee, you don’t have to pay. One option to avoid paying a cancelation fee is to let the listing expire.
Conclusion
You don’t need a lot of money to make an NFT. Creating an NFT for free can be achieved in four simple steps.
- Download a crypto wallet
- Go to Opensea.io and login
- Tap “Create” and fill in the details
- Finally, create your NFT for free
8 thoughts on “How to Create an NFT for Free In 2023 (Step-by-Step Guide)”
Comments are closed.