Opensea is the most popular NFT marketplace in existence. With its wide array of NFTs and easy-to-use interface, it offers digital assets from Ethereum, Solana, Polygon, and Klaytn blockchains. So, how do you buy an NFT on the Opensea marketplace?
How to Buy an NFT on Opensea
To buy an NFT on Opensea, follow these four simple steps below.
1. Go to the Opensea NFT marketplace and sign in.
Open your browser and go to Opensea. It’s crucial that you double-check that you are visiting the real Opensea. If you are on any of the potentially fake sites, you will be scammed.
The official Opensea NFT marketplace is: https://opensea.io/
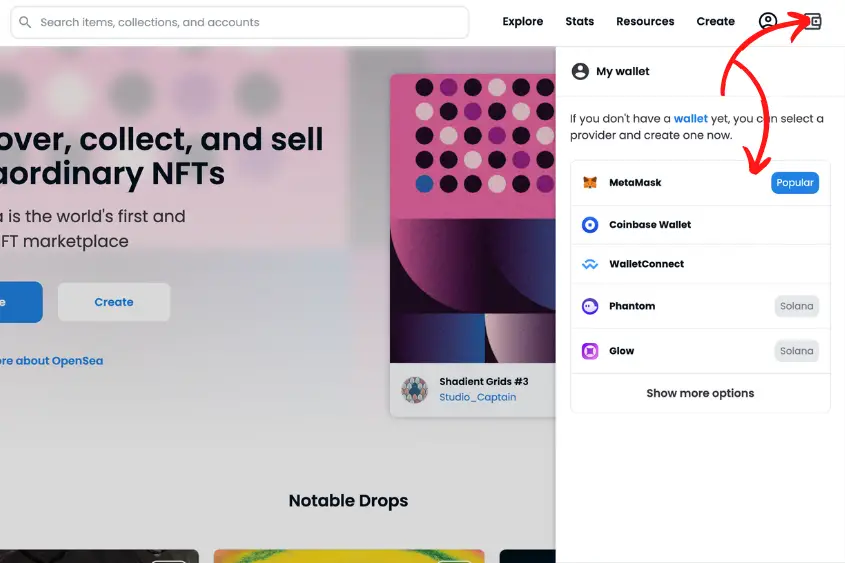
Once you confirm that you are on the correct marketplace, you will need to connect your web3 wallet. To do this, tap the wallet logo in the upper right corner on Opensea’s homepage.
This will pop up a list of wallets supported by Opensea. Select the wallet that you are using. Next, you will be asked to connect your wallet. Verify that you are connecting the correct wallet, then select Next.
After you choose Next, you will be asked to Connect your account. Before connecting your wallet, please verify that Opensea only says:
- Allow this site to: See address, account balance, activity, and suggest transactions to approve
If anything else is being asked, do not proceed. Instead, exit the site and confirm you are visiting the right address.
If everything looks good, tap Connect. You are now connected to Opensea’s NFT market.
To enhance your experience on Opensea, you can also set up your Profile. To do this, tap the avatar icon and choose Profile. Then, go to Settings.
You can then add various details such as a profile and banner image, Username, Email, links to your social media accounts, and other exterior links like a website, and your wallet address. Just make sure to click save once you’re done.
If you want to receive updates regarding your Opensea account such as when an item is sold or if someone accepts your offer, I suggest putting in your email address at the very least.
2. Search for your desired NFT
Navigate to the search bar to begin looking for an NFT to buy. You can search for an NFT by item name, collection name, or account name.
If you are searching for a specific NFT collection, it’s important to verify that the collection you are viewing is verified on Opensea.
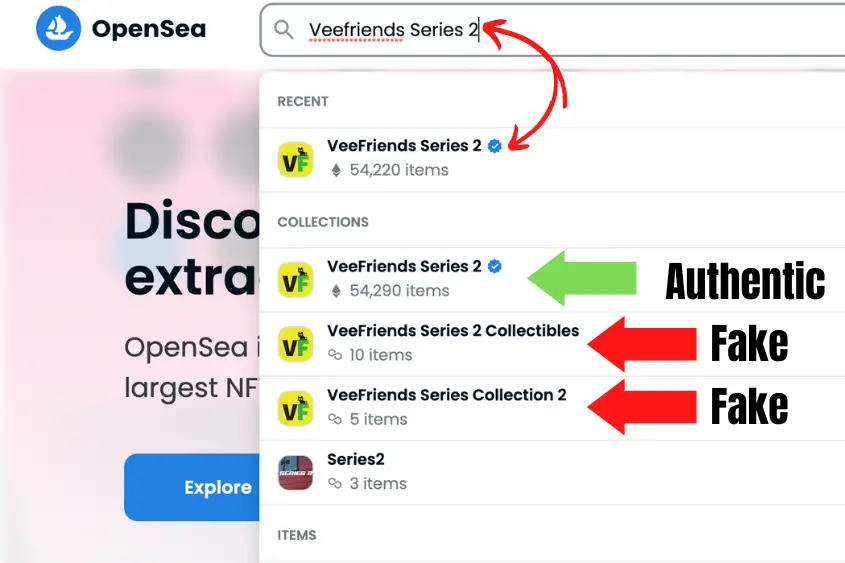
You can do this by ensuring the collection name or item name has a blue checkmark next to it.
Note: Not all authentic NFT collections will have a verified blue checkmark next to them. However, most of the popular collections will have a verified check next to them.
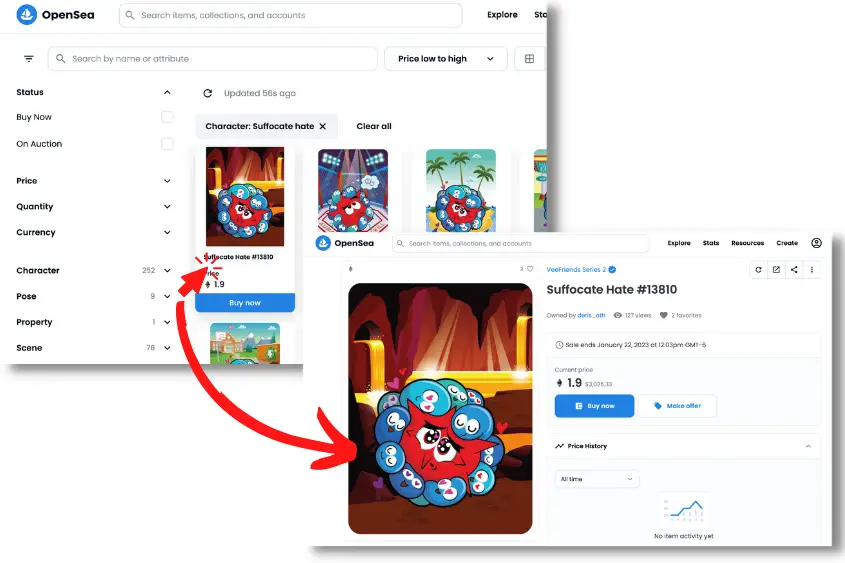
Once you find an NFT you want to buy, tap on the individual asset to bring up your buying options.
3. Press “Buy now” or “Make offer” to complete your purchase
There are two options to buy an NFT on Opensea, Buy now and Make offer.
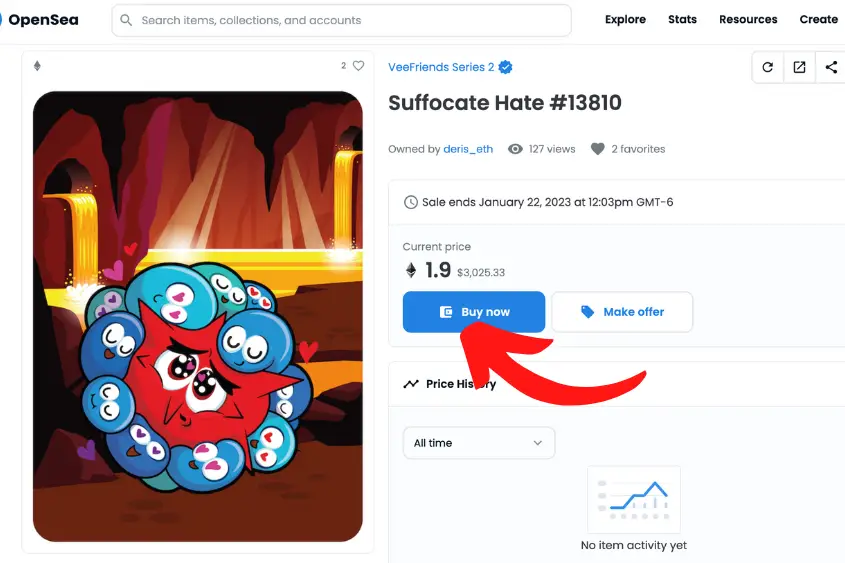
Buy now. You agree to buy the NFT at the listed price.
If you choose the buy now option, you will be taken to checkout.
If you want, you can choose to send the NFT you’re buying to another wallet address. This is a good option if you are using a software wallet to make the purchase, but want to send your NFT to your hardware wallet for safe storage.
Or, if you are buying an NFT as a gift, you can enter the recipient’s wallet address.
If everything looks good, click Complete purchase. A prompt from your wallet will appear.
At this time, you can review and adjust gas fees if you’d like, and see a breakdown of the entire transaction and the total cost.
If you agree to the price, hit Confirm. Depending on the transaction speed you choose (Low, Medium, High) and how busy the blockchain is, it can take anywhere from 10 seconds to over 10 minutes for the transaction to complete.
If you want to guarantee the transaction is successful, choose High when selecting your gas speed. Medium will usually work as well, but, it will take longer.
I don’t recommend choosing Low when purchasing an NFT on Opensea, as you risk the transaction not going through and you still end up paying the gas fee.
If you don’t want to go through with the purchase, simply hit Reject to cancel. There are no fees incurred for selecting the Reject button.
Make offer. You can offer a lower price than what’s listed.
If you want to offer a lower price than what’s listed, select the Make offer option. It’s important to note that you will need wrapped ETH (wETH) to make a bid on an Ethereum-based NFT.
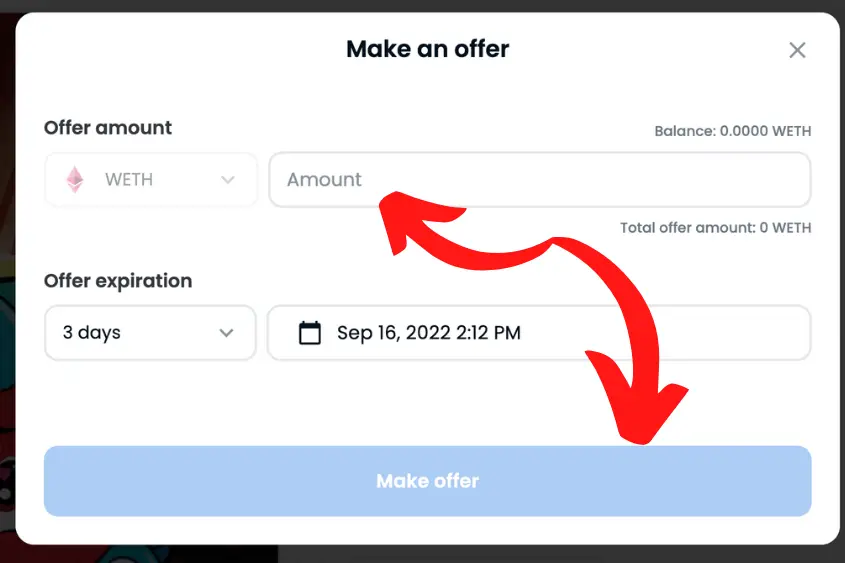
Assuming you have ETH in your wallet, you can enter the amount of wETH you want to offer, then select Add WETH. This will allow you to wrap your ETH using Uniswap and will allow you to make your offer.
Also, you can purchase wETH directly in your wallet using a debit card if you prefer.
There are a few downsides to making an offer on Opensea, such as:
- You have to pay a small fee to wrap your ETH.
- If it’s your first time using wETH, you will have to pay a small transaction fee to submit your offer.
- There’s no guarantee your offer will be accepted.
- Someone else could outbid you.
- You have to pay a transaction fee if you decide to cancel your offer after it’s been submitted.
Of course, the obvious pro of potentially purchasing an NFT for less than what it’s listed for outweighs these cons. But, you should still be aware.
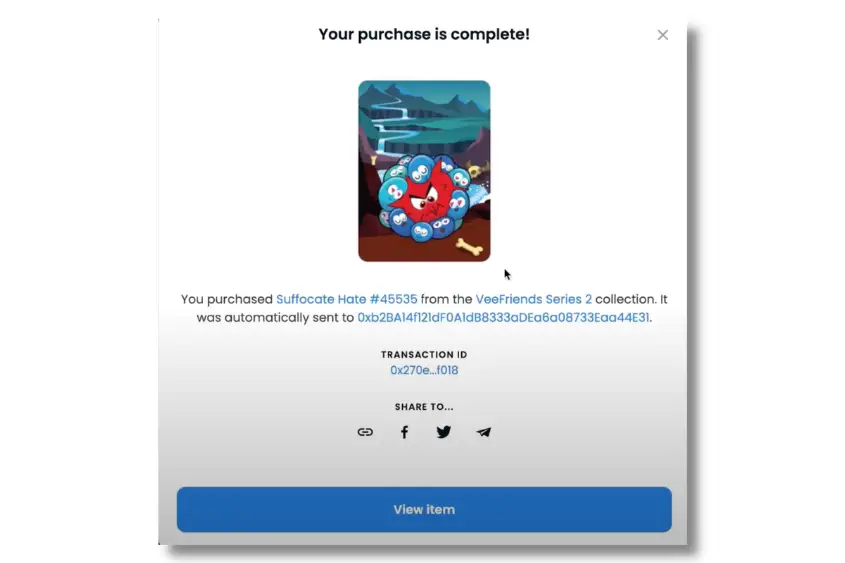
If your offer is accepted, the NFT will automatically be sent to your wallet address and the fee will be sent to the seller.
4. Disconnect your web3 wallet from Opensea
When you are done using Opensea (or any platform that requires you to connect your web3 wallet) it’s important that you disconnect it to avoid potential hacks.
To disconnect your wallet completely from Opensea, you will need to do it from within your wallet. Note that this method will vary depending on the wallet you’re using. However, it is the same concept regardless.
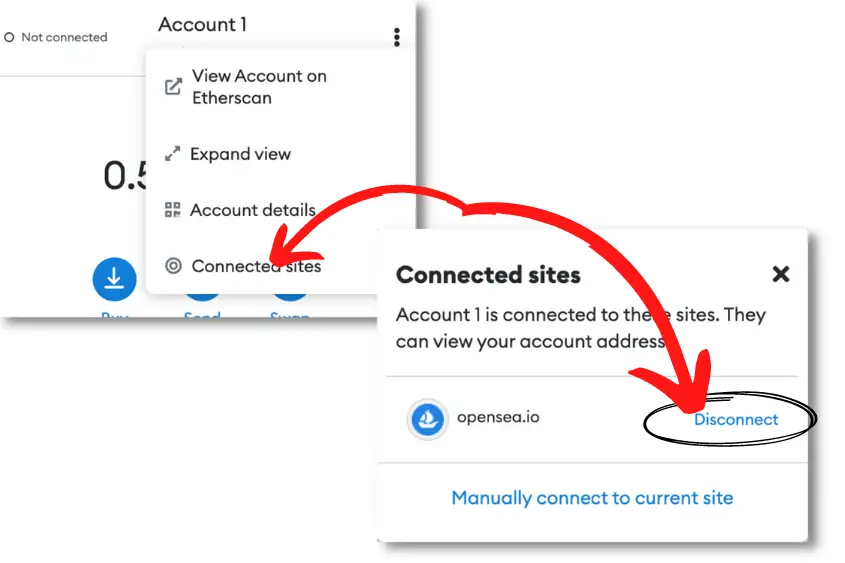
In MetaMask, go to your settings (the three little dots), then select Connected sites, then Disconnect.
It’s also a good practice to lock your wallet when not in use.
To lock your wallet, tap on your wallet’s account icon, then select Lock. This will require you to enter your password the next time you try to connect your wallet to a site.
How to Install Metamask Wallet to Buy an NFT on Opensea
The only way you can buy an NFT on Opensea is if you have a web3 wallet that is compatible with the marketplace. The most popular software wallet to use with Opensea is MetaMask. So, I am going to show you how to setup a Metamask wallet.
For your convenience, I have listed all of Opensea’s compatible wallets further down below.
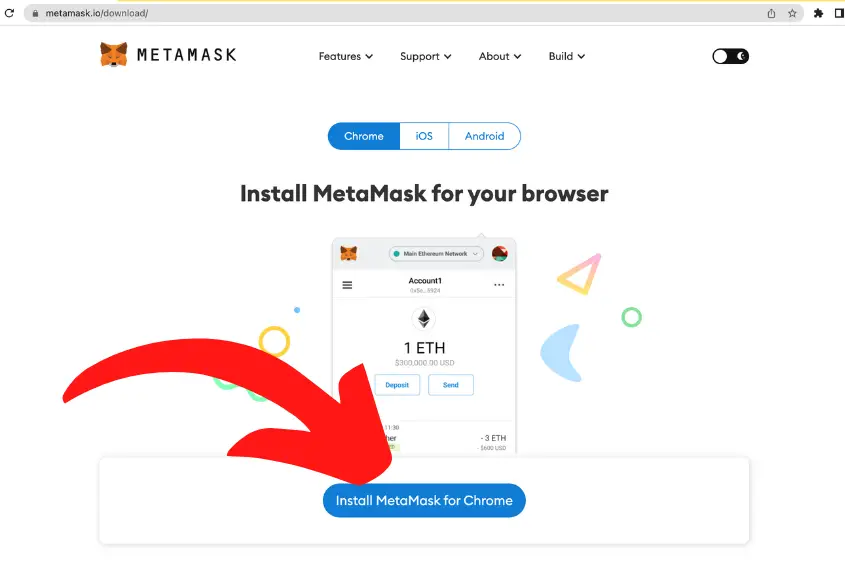
1. Visit Metamask.io/download on your Chrome desktop browser
Always make sure you are visiting the correct Metamask website ending in “io”. If you accidentally visit another website, you can guarantee it’s a fake with malicious intent. Don’t overlook this simple step.
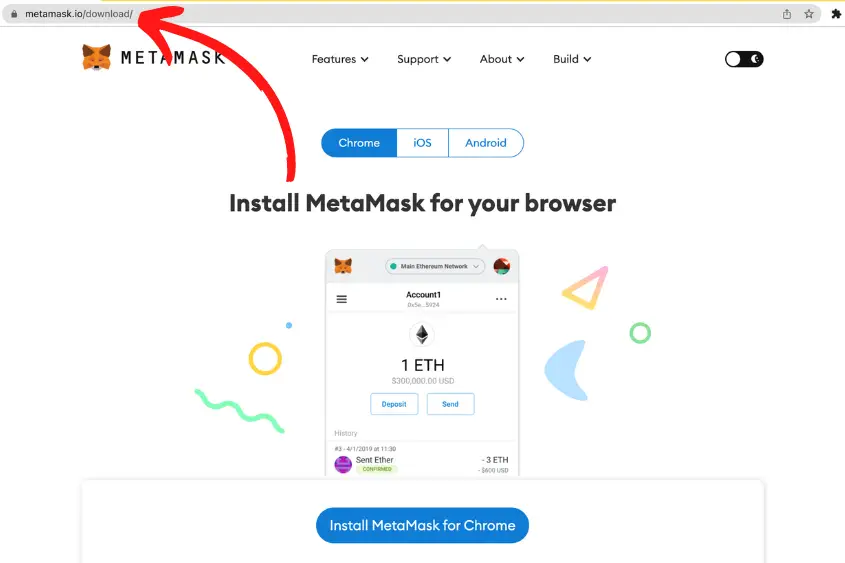
2. Select, “Install Metamask for Chrome”
You will need to use the Chrome browser to install Metamask on your desktop device.
If you don’t use chrome, you can download the mobile app on your iOS or Android device if you prefer. The steps to set up your Metamask wallet will be the same, except you will download the app, not the extension.
3. Choose “No Thanks” or “I Agree” to help improve Metamask
There is no right or wrong answer here. If you want to help Metamask improve its product and service, choose “I Agree”. If you choose to help, they will track your click and pageview events.

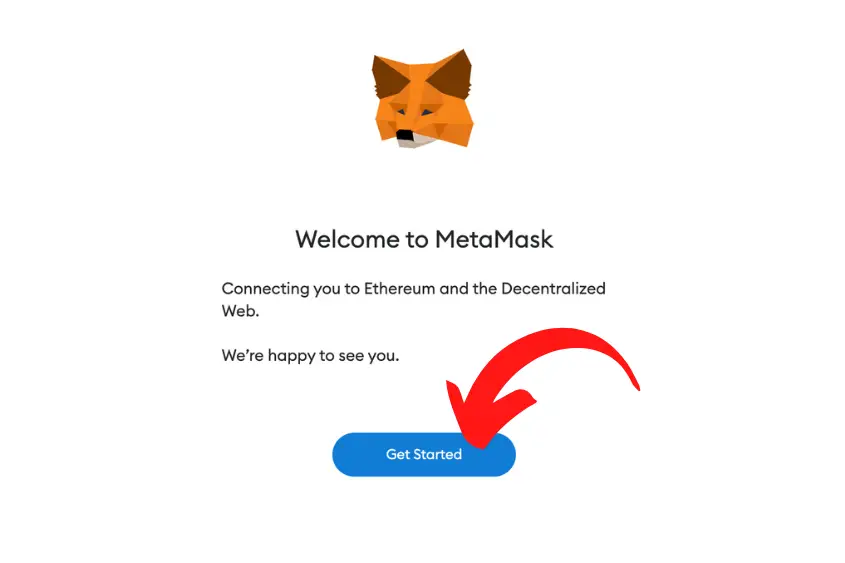
4. Tap “Get Started”
Once you are ready, tap “Get Started”.
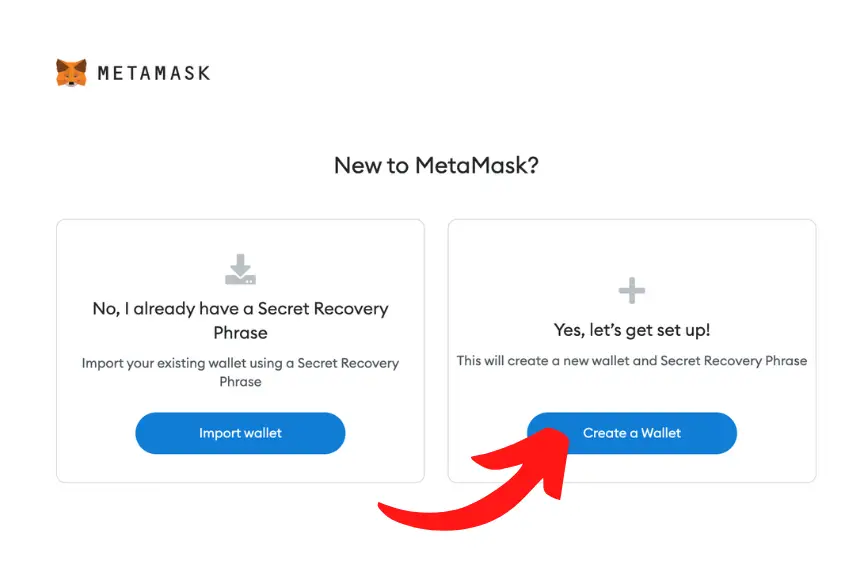
5. Select “Create a Wallet”
If this is your first time setting up a Metamask wallet, select “Create a Wallet”.
If you have an existing Metamask wallet and you have your Secret Recovery Phrase, choose Import Wallet. From there you can enter your phrase, create a new password, and your wallet is ready to go.
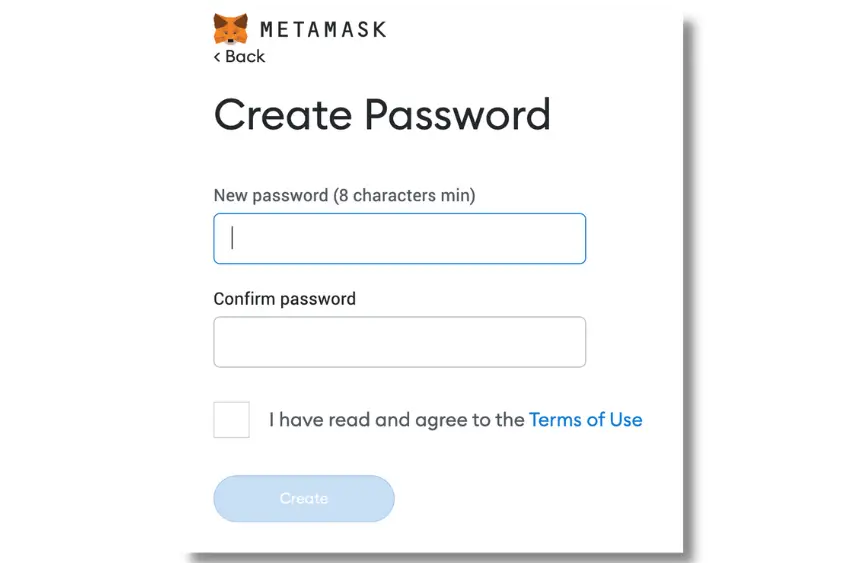
6. Create a Password
Create a password for your Metamask wallet. This password will be used in combination with your Secret Recovery Phrase to access your digital assets.
Make sure you create a strong password that utilizes upper and lower case letters, numbers, and symbols.
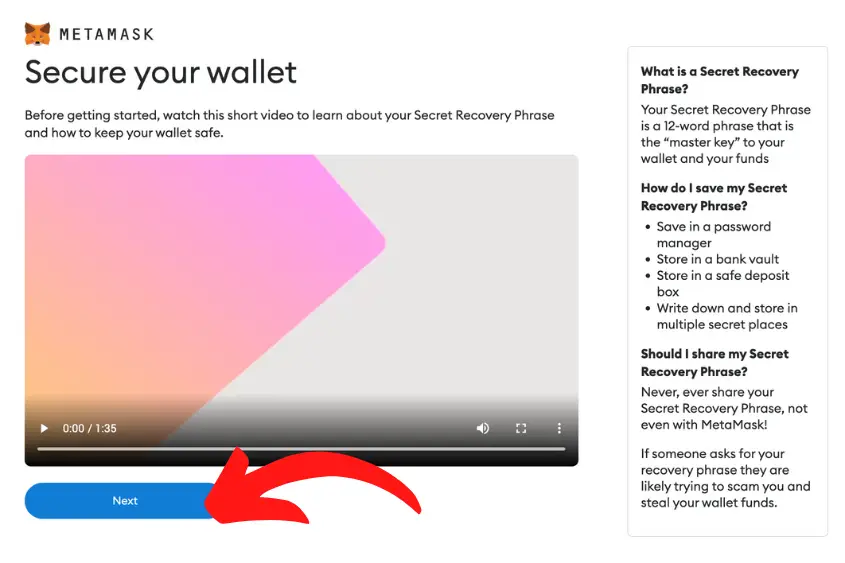
7. Watch the video to learn how to secure your Secret Recovery Phrase
Your wallet’s secret recovery phrase is the key to accessing your wallet and resetting your password.
Anyone that knows your wallet’s Recovery Phrase can control the assets within. Learning how to properly store your Secret Recovery Phrase is crucial.
Never store your recovery phrase online. Instead, store it in a bank vault or your own safe box, and make sure to store it in multiple secure locations.
Most importantly, never share your Secret Recovery Phrase with anyone.
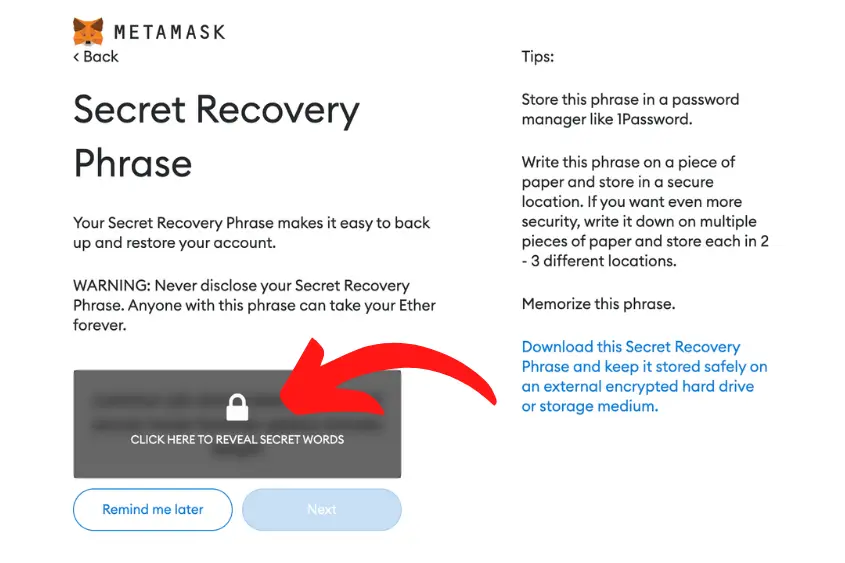
8. Reveal and record your Secret Recovery Phrase
Write down your Secret Recovery Phrase for safe storage. Also, you need it for the next step.
9. Confirm your Secret Recovery Phrase
Your Recovery words will be displayed below the box. Click on each word in the proper order to confirm your Secret Recovery Phrase.
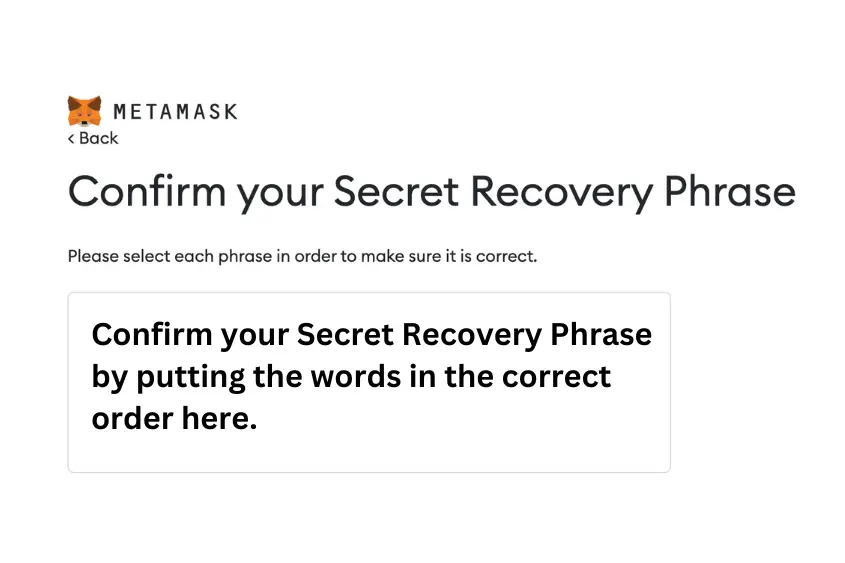
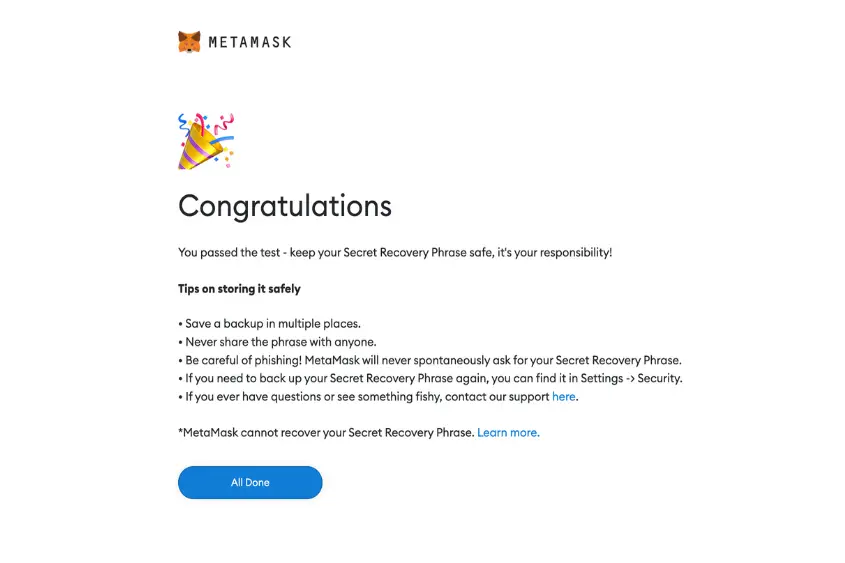
After you have successfully confirmed your Recovery Phrase, your wallet setup is complete!
How to Buy ETH Using Your Metamask Wallet
To buy an NFT on Opensea, you will need to load your crypto wallet with some cryptocurrency. Opensea supports currencies such as Ethereum (ETH/WETH), SOL, USDC, and DAI.
Since ETH is the most popular currency on Ethereum, that’s what I’ll focus on here. Here’s how to buy ETH using your Metamask wallet.
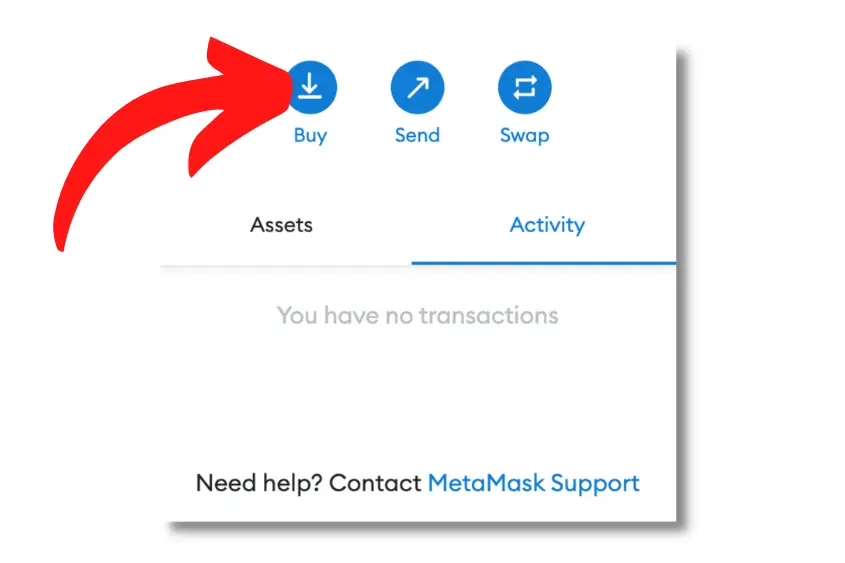
1. Open your Metamask wallet and tap the “Buy” button
To get started, open your Metamask wallet by clicking on your Chrome extension and tap “Buy”.
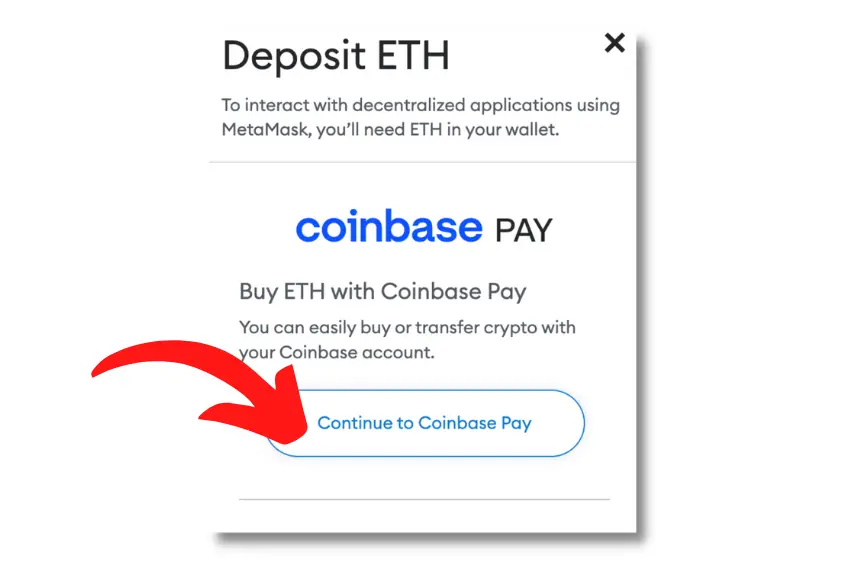
2. Choose Coinbase Pay to buy your ETH
There are several crypto exchanges to choose from when purchasing ETH directly from your Metamask wallet, including:
- Coinbase PAY
- Transak
- MoonPay
- Wyre
- Direct Deposit
Considering Coinbase is one of the most popular and trusted cryptocurrency exchanges, I recommend choosing Coinbase PAY to buy your ETH.
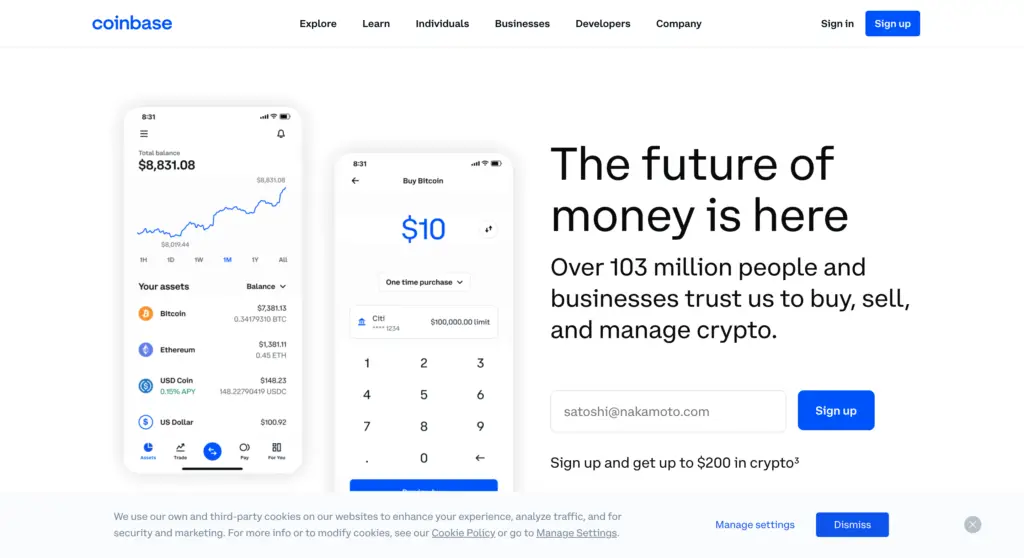
4. Create your Coinbase Account
If you already have a Coinbase account, you can log in and allow access via your Metamask wallet. If you don’t have a Coinbase account, you will need to create an account and connect it to your bank account.
After creating your account, you will need to allow Metmask access to your Coinbase account.
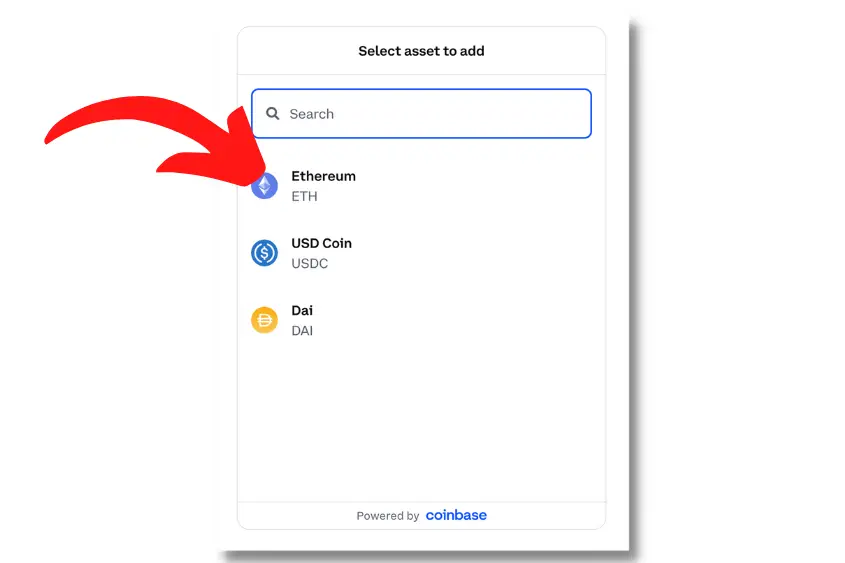
5. Select the asset you want to buy (ETH)
Next, choose the asset you’d like to purchase.
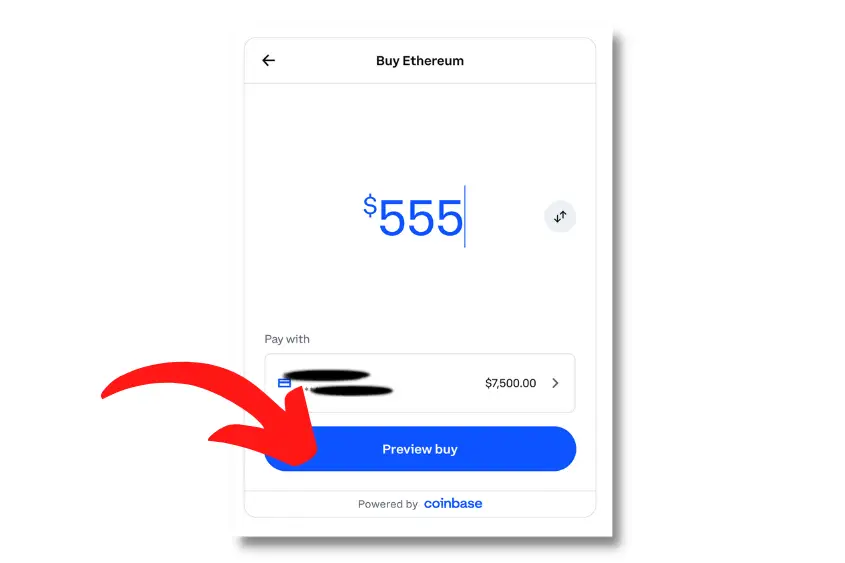
6. Enter the amount of ETH you want to buy, then hit preview
Enter the amount of ETH you want to buy. Then, hit Preview buy to view your purchase before completing the transaction.
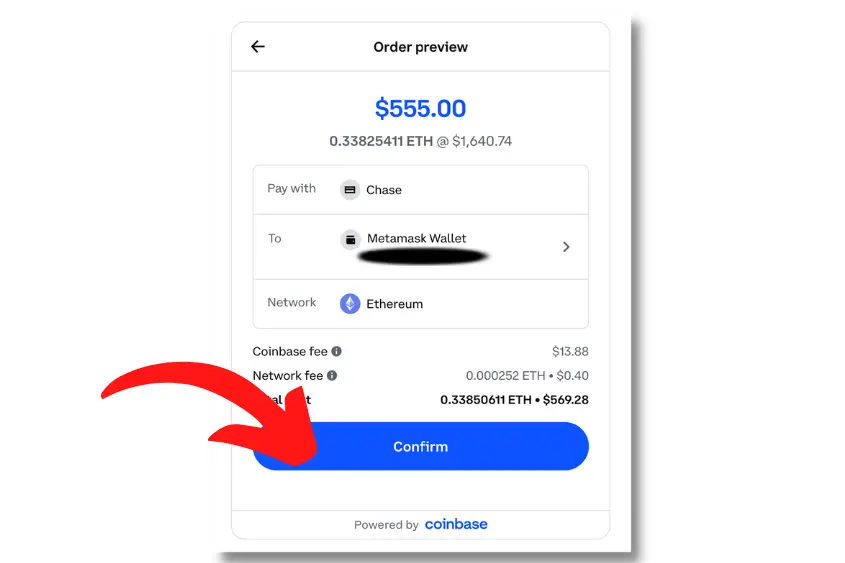
7. Review your order, and confirm the transaction
Review your order to ensure everything looks correct. Double check the amount of ETH you’re buying, your payment method, the recipient wallet (yours), as well as the network.
Also, notice there is a Coinbase fee in addition to a network fee. This will add to your total. So make sure you are aware of this.
Once you’ve verified everything looked good, tap Confirm. Your ETH will appear in your Metamask wallet usually within a matter of minutes. Now, you’re ready to buy your NFT on Opensea.
Which Crypto Wallets Are Compatible with Opensea?
There are numerous web3 wallets that you can use with Opensea. That said, some Opensea wallets are better than others when it comes to safely store your digital assets.
Here is a complete list of wallets that work with Opensea.
| Wallets Compatible with Opensea | Compatible Blockchain | Type of Wallet |
|---|---|---|
| Ledger | Ethereum, Solana, Polygon, Klaytn | Hardware, Mobile/Desktop |
| Trezor | Ethereum, Solana, Klaytn | Hardware, Mobile/Desktop |
| Metamask | Ethereum, Polygon | Software, Mobile/Desktop |
| Coinbase Wallet | Ethereum, Solana, Polygon | Software, Mobile/Desktop |
| TrustWallet | Ethereum, Solana, Polygon, Klaytn | Software, Mobile/Desktop |
| Phantom | Solana | Software, Mobile/Desktop |
| Glow | Solana | Software, Mobile |
| Solflare | Solana | Software, Mobile/Desktop |
| Fortmatic | Ethereum | Software, Mobile/Desktop |
| Kaikas | Klaytn | Software, Mobile/Desktop |
| Bitski | Ethreum, Polygon | Software, Mobile/Desktop |
| Venly | Ethreum, Polygon | Software, Mobile/Desktop |
| Dapper | Ethreum, Flow | Software, Mobile/Desktop |
| Authereum | Ethereum | Software, Mobile/Desktop |
| Torus | Ethreum, Polygon, Solana | Software, Mobile/Desktop |
| Portis | Ethereum, Polygon | Software, Mobile/Desktop |
| OperaTouch | Ethreum, Polygon, Solana | Software, Mobile/Desktop |
How Much Does it Cost to Buy an NFT on Opensea?
The average cost to purchase an NFT on Opensea is $490 according to DappRadar’s all-time average. This price does not include the 2.5% service fee incurred by Opensea, gas fees, or royalty payouts, which can substantially increase the cost for both buyers and sellers on the marketplace.
Here are the fees you should expect to pay when buying an NFT on Opensea.
Service fee
Opensea receives 2.5% of the sale price from every sale. That means you can create your own NFT for free at any time, but if you sell an NFT, Opensea will take 2.5% of your profit.
Note: This fee is only applicable to the seller, as a buyer, you are not charged this 2.5% fee.
Gas fee
If you are buying an Ethereum NFT on Opensea, you have to pay a gas fee. A gas fee occurs anytime a transaction is submitted to the blockchain.
This means you pay a gas fee when you purchase an NFT, list an NFT, make an offer, or cancel an offer. This fee will generally range anywhere from $5 to over $150. This all depends on how busy the blockchain is at the time of the transaction.
You can check current gas fees using Etherscan’s Gas Tracker.
Or if you want to save on gas fees altogether, you can buy different NFTs from other blockchains offered through Opensea such as Solana, Polygon, and Kalytn.
Royalty “creator” fee
As a creator on Opesnea, you have the ability to set a royalty fee of up to 10% on your NFT collection. This allows you to make up to 10% off each secondary sale of your NFT creation.
This fee is paid by the seller, not the buyer.
What Happens After You Buy an NFT on Opensea?
Once you purchase an NFT on Opensea it’s sent to your wallet and the payment is deducted from your wallet and sent to the seller. Note, that your digital asset isn’t stored on Opensea. Rather, it’s stored on the blockchain that you purchased it from at your wallet address.
To access your NFT, you will need to sign into your wallet.
I also want to point out that when you purchase an NFT on Opensea, that doesn’t mean the platform takes custody of your assets. Opensea is simply a platform you can use to buy, sell, send, and view various digital assets.
In no way does Opensea own or control the assets within your wallet. But, they do have the power to de-list NFTs from their marketplace if they have a reason to do so.
If you plan to keep your NFT stored for any amount of time, you should consider storing it in a hardware wallet.
When it comes to safety, a hardware wallet is the best storage solution for all of your blockchain-based assets.
How to View Your NFT on Opensea
To view your collection of NFTs on Opensea, follow these three quick steps:

- Sign in to Opensea using the wallet that contains the NFTs you want to view.
- Go to your Profile.
- Tap the “Collected” tab to view all of your NFTs.
If you just want to view your NFTs on Opensea, you don’t have to sign in with your wallet. You can simply search your username and view your entire NFT collection.
This will only work if you set up your user profile and gave yourself a username.
If you want to sell or send an NFT, you will need to sign into your account using the wallet where your NFTs are stored.
Ultimately, buying an NFT on Opensea is easy. All you need to do is sign into Opensea with your web3 wallet, search for the NFT you want to buy, select your payment method, and make sure to disconnect your wallet before leaving the marketplace.
Just make sure you know how to securely store your NFT before you buy one, otherwise, your risk losing it to a scam or potential hack.
4 thoughts on “Opensea Marketplace: How to Buy An NFT (4 Quick Steps)”
Comments are closed.